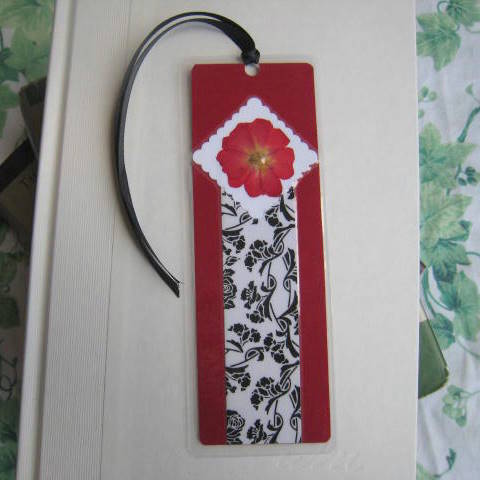
Whew! Now that the holiday season is in full swing, I am busier than ever! Thanksgiving was lovely- we had my cousin and her husband down from Montana, and had a blast with them. We even did a little Black Friday shopping, which I usually try to avoid like the Plague, but went since my cousin is totally into it. Apart from the sleep deprivation, it was fun! I have the shopping almost done, but not quite, and I still haven't wrapped anything. Got my cards but haven't addressed them yet. Still have to write the annual holiday letter. Yikes- too much to do!!
This weekend I finally did carve out some time to get some bookmarks done and a card made for my BFF Kendra, since I need to send her package out tomorrow. We have an annual tradition of sending each other an ornament for Christmas, and this year I got hers when we were on vacation in Leavenworth, WA over the summer. I did not think to get a picture of the card before I packaged everything up, but that is ok, because it's really not one of my better works. Sorry Kendra! Anyway, I did some much needed maintenance on my Etsy shop, relisted some items that had sold previously, and listed a few new items as well. You will remember the map bookmark I posted about awhile back- I made a couple more of those, as well as two other map designs that I did not post previously:
These are from the same bunch of scrapbook paper that Kendra sent me awhile back, and I really like these- they are kind of Old-World looking. They are actually the same map pattern in different colors, which I had not noticed until today! I really like them. I need to get over to Goodwill and see about finding some atlases that I can use, since this is such a neat concept!
(Side note, does anyone know why Blogger wants to put all these random extra line spaces before and after the photos?? Arrggghh! So frustrating!!)
A couple more florals that I listed, one to replace one that sold awhile ago, and another that I made awhile back but didn't get around to photographing until now:
The one with the teal, lime green and blue butterfly delphiniums is similar to one I did before- the difference is that I had used teal handmade paper on the previous one. On this one, I used regular scrapbook paper of the same color. Interestingly enough, within about 15 minutes of listing these in my shop, I got an order for that one, plus the pink and green dyed daisy bookmark! First time THAT has ever happened! Maybe I will have a bit of a holiday rush after all!
I'm still in on the PBS Swappers paper craft group, but have been too busy lately to participate in any of the challenges. I have joined a couple of the swaps though. Most recently, we did a winter bookmark swap, and of course I participated in that one! I did not get a picture before I mailed them off, but this is the picture that our lovely hostess, Christy, posted on the PBS Swappers site:
That one was fun to make! I used two different Martha Stewart snowflake punches plus another smaller snowflake punch and layered them in purple, white and silver papers. The outer frame is a deep purple, and the background is actually a blue vellum over white card stock, so it gives it a nice icy-looking finish. I have joined two swaps that will be taking place in the near future- one is a Hello/Hi card, and the next is a Thank You card. I already have a couple of ideas for the Hello card, and will be working on that one first, since the deadline for it is the end of the month. The Thank You card doesn't need to be done until next month, so first things first!
Finally I have a new Kitchen Creation to share. This was a new experiment, and while I think it can use some tweaks for next time, it turned out pretty tasty. I was inspired by a package of pork stew meat that I ran across in the grocery store, which I don't think I've ever seen before. But maybe I just haven't been looking for it. In any case, since we have been all turkeyed-out for the last week after Thanksgiving, I was browsing the pork section in the meat department and had to get it when I spotted it. I recalled a recipe that I had made many years ago that I loved at the time, and then of course lost the recipe, but that is what inspired this dish. The lost recipe was for a pork roast in the slow cooker, with potatoes, green cabbage and onions, seasoned with fennel seeds and a little vinegar. I thought that perhaps I could take that same idea and make a stew with those ingredients. I did not have any cabbage or fennel seeds- but, hey! I had some brussels sprouts and a fennel bulb, so why not use those? Now, I know that not everyone likes brussels sprouts, but I happen to love them. If you don't like them, you can leave them out. It's ok, I won't be offended. I was flying solo without a recipe here, and like I said, there are some things I would do differently next time, so the recipe here is what I would recommend including those changes.
Pork Stew with Potatoes, Fennel, and Brussels Sprouts
Ingredients:
(Some items are not pictured. That's because I figured out a few things along the way, after I took the picture.)
1 lb. pork stew meat, trimmed and diced into 1-inch cubes
2 slices of bacon, diced
1/4 cup flour
Potatoes- about 4 (I used Yukon Gold), halved lengthwise and sliced thinly
1 small onion, sliced thinly
3 garlic cloves, minced
1 leek, sliced lengthwise, rinsed thoroughly, then sliced thinly crosswise
About 3 cups brussels sprouts, washed, trimmed, and quartered lengthwise
1/2 of a fennel bulb, core removed, sliced thinly
1 1/2 cups chicken broth
3 tbsp apple cider vinegar (or more, to taste)
1/4 tsp dried thyme leaves
1 bay leaf
salt/pepper to taste
Instructions:
1. Cook bacon in a large skillet until crispy. Remove bacon and set aside, reserving fat in pan.
2, Place flour in a large resealable bag and add some salt and pepper. Add pork cubes and toss to coat well with flour mixture. Remove pork from flour mixture and shake off excess flour. Heat reserved bacon drippings in skillet and add pork. Brown well on all sides.
3. Place potato slices on bottom of slow cooker. I used my 6-quart cooker. Add onions, leeks, garlic, and fennel. Add pork. Combine chicken broth and vinegar and pour over the top. Cover and cook on high for 2 hours.
4. Lower heat to Low and add brussels sprouts to the top. Replace lid and continue to cook on low, about 4 hours, or until brussels sprouts and potatoes are tender.
5. Stir to incorporate ingredients and add salt and pepper to taste. If necessary, add a bit more vinegar. Serve topped with reserved cooked bacon.
My notes: I really liked this. It's really tasty with a little bit of tang from the vinegar, but it's not overwhelming. The onions add a little bit of sweetness, the fennel gives it an earthy undertone, and the pork is falling-apart tender. The vinegar gives the brussels sprouts a nice bright flavor, and the smokey, salty bacon brings it all together. This is admittedly not the most *attractive* dish I've ever cooked, but it was tasty, filling, and warm, and just perfect for a cold late fall night.
Hope you enjoyed this Kitchen Creation! I love to cook and love sharing recipes, so if you try one of the recipes I post here, I would love to hear from you! Please feel free to leave me a comment and ask any questions you might have or tell me how you liked it!
Sunday, December 5, 2010
Sunday, November 21, 2010
Winner of the Drawing!
Hello everyone! Life is starting to get busy, now that we are getting into the holiday season! I have most of my Christmas shopping done already, and am getting ready for family to arrive for Thanksgiving. As such, I have had no time for crafting whatsoever. I am missing it! Hopefully once Thanksgiving is over, I will have some time before Christmas to do some stuff. I got some new Spellbinder circle dies that I've been eying at Craft Warehouse, and since I had a 40% off coupon I splurged and got them. So now I'm anxious to use them!
But onto the important stuff- the drawing for a 4-pack of bookmarks! I had entries from the holiday bazaar a couple of weeks ago, as well as some entries from here on my blog. A few people got double entries for following my blog, and for that I thank you! All of the entries were combined, and one lucky winner was drawn. And it is.....Heather! Congratulations, Heather! Heather entered my drawing at the holiday bazaar, and being that she is the mom of one of my daughter's best friends, she will be easy to find to give her prize! Thanks so much to everyone else for entering! Please be sure to check back, because this is the third giveaway I've done, and I plan to do more in the future, so you may get lucky yet!
Take care everyone, and have a great Thanksgiving! I'll be back next time with a new Kitchen Creation that is good for the holidays, and if I have time to do any crafting between now and then, I"ll post what I come up with then! Ciao!
Sunday, November 14, 2010
1-Flower Bookmark Launch and a New Kitchen Creation: Chicken Tikka Masala
Well, I hope everyone has remembered to enter the GIVEAWAY for a four-pack of bookmarks of your choice! Instructions to enter are HERE. Only one more week to enter and win!
Last weekend at the holiday bazaar, I caught up with my friend Michele, who I haven't really seen much of in awhile. It was really fun! I have known her for several years- she was my son's kindergarten teacher, and being that she has a stepson the same age, we found that we had a lot in common and became friends when the boys were young. My daughter also had her for kindergarten, but since Michele still has young kids, we don't see a lot of each other anymore. I totally get it....when my kids were young (4-6) I barely had time to sleep and go to the bathroom! Anyway, in addition to teaching, she also sells Avon, and had a great table at the holiday bazaar. She got a couple of bookmarks from me, and asked for a custom one with blue dragonflies for a gift for another friend. Well, I can do that, no problem!
I actually used sliver for the bodies, but the rest are in lovely shades of dark and light blue. You can't tell in the picture, but the paper I used has an iridescent finish. I really like how it came out!
I finally have my 1-flower bookmarks listed in my Etsy shop, and will soon be adding a 3-bookmark bundle of these for one low price. These will be great for stocking stuffers, gifts for teachers, coaches, daycare providers, or coworkers, all for one low price! I listed most of them already, but still have a few to put up, and will get to those later in the week.
Now, onto the latest Kitchen Creation. As I have mentioned, I love to cook and really enjoy trying new recipes. This recipe is from the cooking magazine I mentioned a couple of posts back, America's Test Kitchen Special Collector's Edition Best-Ever Recipes , which is a FANTASTIC cooking resource! I have now made 5 recipes from this issue, and all have been outstanding! This is the latest. It is an Indian-inspired chicken dish that is wonderful served over rice with a veggie side. I have found that it is at least as good as leftovers as it is cooked fresh. I made a big batch yesterday so that I will have some this week to take to work for lunch. That is, if my husband will leave me any! Here is the info:
Ingredients:
Chicken Tikka:
1/2 tsp ground cumin
1/2 tsp ground coriander
1/4 tsp cayenne pepper
1 tsp salt
2 lbs boneless skinless chicken breasts, trimmed
1 cup plain whole-milk yogurt
2 tsp vegetable oil
2 garlic cloves, minced
1 tbsp grated fresh ginger
1/2 tsp ground coriander
1/4 tsp cayenne pepper
1 tsp salt
2 lbs boneless skinless chicken breasts, trimmed
1 cup plain whole-milk yogurt
2 tsp vegetable oil
2 garlic cloves, minced
1 tbsp grated fresh ginger
Masala Sauce:
3 tbsp vegetable oil
1 onion, minced (about one cup)
2 garlic cloves, minced
2 tsp grated fresh ginger
1 serrano chile, ribs and seeds removed, chile minced
1 tbsp tomato paste
1 tbsp garam masala
1 (28 oz) can crushed tomatoes
2 tsp sugar
salt
2/3 cup heavy cream
1/4 cup chopped fresh cilantro
1 onion, minced (about one cup)
2 garlic cloves, minced
2 tsp grated fresh ginger
1 serrano chile, ribs and seeds removed, chile minced
1 tbsp tomato paste
1 tbsp garam masala
1 (28 oz) can crushed tomatoes
2 tsp sugar
salt
2/3 cup heavy cream
1/4 cup chopped fresh cilantro
1. For the chicken: Combine cumin, coriander, cayenne, and salt in a small bowl. Sprinkle both sides of chicken with spice mixture, pressing gently so that the mixture adheres. Place chicken on a plate, cover with plastic wrap, and refrigerate 30 to 60 minutes. In a large bowl, whisk together yogurt, oil, garlic and ginger; set aside.
2. For the sauce: Heat oil in large Dutch oven over medium heat until shimmering. Add the onion and cook, stirring frequently, until light golden, 8 to 10 minutes. Add garlic, ginger, chile, tomato paste, and garam masala; cook, stirring frequently, until fragrant, about 3 minutes. Add tomatoes, sugar and 1/2 tsp salt; bring to a boil. Reduce heat to medium-low, cover, and simmer 15 minutes, stirring occasionally. Stir in cream and return to a simmer. Remove pan from heat and cover to keep warm.
3. While the sauce simmers, adjust an oven rack to the upper-middle position (about 6 inches from the heating element)and heat the broiler. Using tongs, dip the chicken into the yogurt mixture (the chicken should be coated with a thick layer of yogurt) and arrange on a wire rack set in a foil-lined rimmed baking sheet or broiler pan. Discard the excess yogurt mixture. Broil the chicken until the thickest parts register 160 degrees on an instant-read thermometer adn the exterior is lightly charred in spots, 10 to 18 minutes, flipping the chicken halfway through cooking.
4. Let the chicken rest 5 minutes, then cut into 1-inch chunks and stir into the warm sauce (do not simmer the chicken in the sauce). Stir in cilantro, season with salt to taste, and serve.
My notes: I served this with rice, which did a good job soaking up the yummy sauce. I subbed half and half for the cream and probably just put in half a cup, rather than the 2/3 it called for.
Seriously, this is SO.GOOD. It's spicy, but not necessarily hot- just a WHOLE lotta flavor! Apparently, this is not a traditional Indian dish. It's a fake Indian dish invented by Americans who really really like Indian-type food. The fact that it is not authentic should not deter you from trying this, however. Because it is REALLY REALLY good!
That's all for now! I will be back next time with the winner of the drawing , and a few new items for the shop. Have a great week everyone!
Sunday, November 7, 2010
Holiday Bazaar, New Stuff About to Launch, and THE GIVEAWAY!
I mentioned last time that this weekend, I would be participating in a holiday bazaar that a friend of mine does with one of her friends. This was the fourth year that they did this, and though I heard it was not as busy as years past, I thought it went pretty well! My daughter and I packed up our card table and LOTS of bookmarks and got over there in time to set up our table with some nice festive decorations by the opening at 11:00. We had our first sale by 11:10! We sold 11 bookmarks and a set of magnets, plus got a custom order for a bookmark, so all in all, we did way better than I've done in the last 4 months in my Etsy shop! Here is my daughter at our table, just before the bazaar started:
You know, card tables are really not good for much else besides maybe playing solitaire- there was NOT enough room to display all the stuff I had! I had to encourage people to dig through my piles of bookmarks so that they could see all of the designs. It was a full table indeed.
Anyway, it was lots of fun, and I got to see all kinds of neat stuff that other people were selling. There was a Pampered Chef consultant there, and I just LOVE their stuff! They have the BEST garlic press I have ever owned- I had one for many years and it finally broke just recently, so I ordered another one. Can't wait to get it, because I use a lot of garlic! So, good fun, a few sales, so I'm happy!
So I am gearing up for the holidays now, and in preparation for both the bazaar and the upcoming holidays, I have made a lot of new stuff. I mentioned before that I would like to have some holiday-themed bookmarks, and also some flower bookmarks that I can sell in packs of 3 or 4, which would be great for stocking stuffers. I finally got some holiday designs that I like- see what you think!
These holiday ones I think I will sell in a 3-pack with one of each.
Here are a few of the new one-flower bookmarks. Remember I did a few awhile back, and I was kind of luke-warm on those designs? I like these a lot better!
Needless to say, I have been VERY busy in the last week or so! The good news is, my inventory is stocked. The bad news is, I have a LOT of bookmarks to photograph and do photo editing before I can even think about listing them in my shop! That, I have to say, is my absolute least favorite part about being an Esty seller....I have never been much of a photographer, it is not something I enjoy, and that is the real *work* part of what I do. I did a marathon photo session today, and am about halfway through the editing, so this week will start listing in my shop.
Oh, one more I want to show you! This is so cool:
Kendra sent me this cool scrapbook paper that she had that looks like maps. There were three different map patterns, and I made one bookmark out of each pattern for the holiday bazaar. This is the only one that is left- the other two were among the first to sell yesterday. So at least I know there is a demand for these! I am thinking that maybe I need to abuse my AAA membership just a little bit and go get some maps so that I can make some more! I had a couple of people ask me about maps with specific places on them, so I think that is a market that can be explored. And very fitting too....I make maps in my day job (not cool ones like these, just stuff like zoning and population density and stuff that), so it's interesting that on my journey into a creative pastime, I have come full circle back to what I have always done.
Ok, so I have saved the best for last. I am finally going to do the giveaway I have been promising! I kicked it off yesterday at the bazaar and got several entrants already. I am going to give away a four-pack of bookmarks of ANY design in my shop- a $20 or more value! You can choose from any of my designs that are already in my shop (sorry, custom/personalized bookmarks are not eligible) if you win. This would be a great way to start off your holiday shopping, because bookmarks make fantastic stocking stuffers or gifts for teachers, coaches, coworkers, or to pair with a book or book store gift card for a nice holiday gift!
You can enter the drawing by leaving a comment on this blog post. If you follow my blog, I will enter you twice- this goes for existing and new follwers! Make sure I know how to get ahold of you if you win, especially if you comment anonymously. You can also increase your chances of winning by promoting this giveaway on your blog! Just leave a separate comment with a link to your blog post where you mention this giveaway, and I will enter your name to the drawing AGAIN! I will take entries until 6:00pm Sunday, November 21st (PST), and will announce the winner later that evening. I will also contact the winner by email, so if you comment anonymously, make sure you leave your name and email address in your comment.
Good luck everyone!
Monday, November 1, 2010
The Busy Season
It is officially here. Know how I know? Because I"m losing track of stuff. I'm one of those types who writes stuff down, but only as a backup, because usually I can keep track in my head. But now? Well, it's getting harder, and I can't take any risks. I'm actually having to go back and look at my notes! But it's all good- I can handle it. Been doing it a long time, so no problem!
Anyone got a Valium??
So, this past weekend was Halloween, and we were SUPER busy. My son had a band competition to go to, and the rest of us had a party at friends' house on Saturday. I cooked a whole bunch, and it was SO worth it. I even got to bring home some leftovers! I have to tell you, this cooking magazine I got last week is really fantastic- three of the four dishes I made this past weekend were out of it! America's Test Kitchen Special Collector's Edition Best-Ever Recipes has an unbelievable number of incredible, easy to understand recipes for dishes that we all recognize and are absolutely delicious. And I am not being paid to endorse this magazine at all- that is how much I love it! I have only had it just over a week, and have already made four recipes from it- all with amazing success. If I can make one point right here, right now: GET.TO.YOUR.NEWS.STAND.NOW and get a copy, because according to mine, it should only be on display until December 13. Anyway. For the party this weekend, I made two recipes from this magazine: Korean Fried Chicken, which I adapted for chicken wings, and Apple Slab Pie, which is an amazing glazed apple pie made in a rimmed baking sheet, the equivalent of two regular pies. Both are somewhat labor-intensive, but so, so good! I encourage everyone to get a copy of the magazine. I look forward to trying many other recipes in it in the future.
Another dish I made for the party was one of my own design, a Halloween trifle. I found this fantastic Halloween cake mix that was orange (colored, not flavored) with a fudge swirl, and that is what I used as the base. I layered chunks of the cake with Cool Whip, chocolate pudding, and crushed Butterfingers, topping it with Cool Whip decorated with chocolate syrup. I *attempted* to make a spider web design...but what can I say- I'm not much of an artist! Here is my final product:
Trust me, it tasted a lot better than it looked! I took it to our friends' party, and I did not have much to bring home when it was over. It was really yummy!
My exciting craft-related news this week is that I will have a table at a holiday bazaar that is put on by a friend of mine and her friend every year. It is coming up this Saturday, so I don't have much time to prepare! I got a table cloth and some decorations for my table, and hopefully I will have enough inventory to make it worth everyone's while! I am really looking forward to it. I enjoy shopping at this bazaar every year, so am really excited that I get to sell there this year!
I am trying to catch up and am still planning a giveaway, so don't think that I forgot! Soon, I promise!
Sunday, October 24, 2010
A Couple of Cards, and a Whole Lot o'Bookmarks
It's funny how the holidays sneak up on you.
I mean, next weekend is Halloween. Then, there's Veteren's Day, just a couple of weeks later. That's when I like to do the bulk of my Christmas shopping. It is so great! The stores are pretty well stocked, but they're not crowded and you can park with no problem. I started shopping on Veteren's Day when my daughter was a baby, and it saves me a lot of stress during the holidays.
Then just a couple of weeks later is Thanksgiving. Yikes! Then you know what happens after that...the weeks fly by, and you blink, and suddenly it's like 3 days before Christmas. And there you are, cruising Target at 9:30 on a Tuesday night, frantically searching for what can pass for a few more stocking stuffers, crazily trying to remember if you have enough wrapping paper left, eyes glazed over as you survey the remaining dregs of holiday decor that lies limply on the shelves, and you silently scream to the heavens, "WHY? Why didn't I SHOP SOONER????"
Not that I have any personal experience with this, or anything.
(Ahem.)
So anyway, yes, the holidays are nearly upon us. Target has holiday cards in the same aisle as the clearance Halloween stuff. Michael's finally- FINALLY- has some Christmas papers. Yay! Any holiday crafting that is going to get done had better get started real soon! This hit me sort of all of a sudden this morning. It's not that I wasn't aware that the holidays are coming, I guess I was just sort of in denial. When I realized it's only a week until Halloween, it sort of lit a fire under my behind, and it got me thinking about doing some holiday decorating in my Etsy shop. Not only that, but there's a local holiday bazaar that I would like to participate in, and I realized that I probably need to get some inventory going for both. Funnily enough, I got an email just today that the holiday bazaar in question has been scheduled, and is only 2 weeks away! I'm still waiting to hear if there is space for me to set up a table, but in hopes that I can, I spent today trying to figure out what I can offer there. I also did some thinking about my Etsy shop, and what I might be able to offer that would appeal to holiday shoppers. First, I decided that maybe some holiday-themed items would be in order. I came up with a few winter and winter-holiday bookmarks that are pretty easy to put together.
These are still a work in progress. I like the poinsettia one, and I mostly like the snowflake one, though there are a few tweaks I have in mind for that one. The star bookmark, I'm not so sure. I used a midnight blue border, white background, and an embossed silver stripe up the center to a star that has gold and silver layers (it's hard to see the silver in this picture). It looked ok in my head, but now when I look at it, it makes me think of football helmets, like it should be a logo for a NFL team. So, back to the drawing board on that one. I like the stars though- they are from a new Sizzix die set that I got with a coupon at Michael's. I just need to figure out a good way to use them.
Next, I thought about what might make shoppers in my Etsy shop want to buy rather than just browse. It's true, my bookmarks are expensive for bookmarks. If you're talking about stocking stuffers, maybe you don't want to spend $5 or $6 on something like a bookmark. So, I came up with some designs with just one pressed flower per bookmark, and use embossed or patterned paper for visual interest. My idea here is to offer these less expensive bookmarks in a "stocking stuffer multi-pack"- maybe 3 or 4 to a pack, for one package price. I spent a couple of hours this afternoon in a creative brainstorm and made a bunch of different samples. Some I like, some, not so much, but I never know how an idea will really look until I actually create it. I think I got at least a few here that I will try again.
The general design for these was inspired by a bookmark that my BFF Kendra made awhile back. She is so much better at layouts than I am! Her mom is an artist, so it's in her blood I guess. Anyway, I'm going to keep working on this concept, and hopefully have some to list in my shop before holiday shopping gets into full gear.
Also this weekend I played around with making some pressed flower cards. I have had some trouble figuring out the best way to do these, because I'm concerned about keeping the flowers safe once they're attached to the card. I have posted before about my experiments using Mod Podge to protect the flowers, but in the end, I really don't like how the texture comes out. The flowers maintain a sort of "wet" look even after the Mod Podge has dried, and even with the matte finish it creates a somewhat glossy surface. I have also noticed that it leaves a slightly yellow coloring, which is fine if you have yellow items, but not otherwise. I then tried a Krylon acrylic spray, and experimented with spraying the flowers before adhering them to paper. It sort of works- the problem is that when it dries, the flowers sort of curl up at the edges, which makes them hard to work with. Spraying them after they are adhered to paper or card stock is not ideal either, because then there is some warping in the paper. What I have figured out that looks the best is to use the Mod Podge to adhere the flowers to the card stock, but leave them unfinished on top. A light coat of the Krylon spray seems to do ok, at least it doesn't warp the paper too much, but I'm not sure how much protection it offers. I'm especially concerned with sending cards like this through the mail- I'm not sure if they would hold up being processed through the USPS machines. I think what I'll do is mail one to myself so I can see how it comes out in the end.
Here are the two cards I made this weekend. Since my daughter has been going to a lot of birthday parties lately, that's where my mind has been, so I made these with bright, fun colors that appeal to girls.
I know I said I would be doing more leaf projects, but I didn't have time this weekend. I'm going to try to get my giveaway organized this week and hopefully post it next week- so if you like my fall leaf items, be sure to check back, because I'll be giving some of them away!
Saturday, October 16, 2010
Kitchen Creations- A New Feature on My Blog
I started this blog with the intent of using it as a record of my crafting, but I don't know how interesting all of that is for other people to read. (Assuming anyone actually DOES read my blog...) So I thought I might mix things up a bit by adding a feature called Kitchen Creations. In addition to crafting, I also love to cook, and have been doing that a lot longer than I have been crafting. I love reading cookbooks, I subscribe to tons of cooking magazines, and I love to experiment in the kitchen! With this feature, I plan to occasionally share recipes, tips, or cooking adventures in the hopes that my creations in the kitchen will be useful and/or interesting to read.
For my first Kitchen Creations post, in honor of the crisp fall weather, I'm going to share a delicious and healthy soup recipe. Soups are one of my favorite things to make. One of the very first recipes I ever came up with on my own was a soup recipe. It was a cream of broccoli with cheddar that was inspired by a soup I'd tried at a restaurant and just HAD to have again (and again, and again!) My BFF Kendra will remember it from our college days, as it was a favorite during the cold seasons when we were rooming together. Now that I'm older, I try to stick to healthier soups, although I do make that broccoli and cheddar soup a couple of times a year for old times' sake. Soups are great to make at home, because they are so much better than anything you can get out of a can. They are warm and satisfying, and you can make a big batch that will last several days. I usually make a big pot of soup every Sunday from fall through spring, and even occasionally in the summer too. It's great to bring to work for lunch, and if I need something quick for dinner, it heats up in minutes in the microwave. If you've never tried making soup at home from scratch, consider giving it a try- it's really quite easy! One warning though- you may become a soup snob and be unable to eat canned soup ever again!
So, on to the recipe: Roasted Vegetable Soup, otherwise known as "clean out your vegetable crisper" soup. What's really great about this soup is that there are very few rules here- you can use just about any vegetables that you have on hand. I've made this soup several times now, and each time it's different, depending on what I have in my fridge. This recipe comes from my online friend Dina, who saw someone make a version of this on a TV show, and she shared it on the internet board where we are both members. Several other board members have tried it as well, and every single person who has tried it has come back to rave about it! Let's get started.
Ingredients:
Fresh vegetables- whatever you have on hand. I used carrots, celery, broccoli, cauliflower, tomatoes, yellow bell pepper, zuchini, 1/2 of an apple, 1 parsnip, 1 onion, 1 russet potato, and a few cloves of garlic.
Olive oil
Chicken broth (you could also use vegetable broth, though I prefer chicken)
Salt and pepper to taste
Herbs for garnish (optional)
For this version, I also added a drained and rinsed can of garbanzo beans.
Directions:
1.Preheat oven to 400 degrees. Prepare vegetables for roasting- peel, cut, chop as necessary into relatively uniform bite-size pieces. For tomatoes, slice in half and squeeze the seeds out before chopping.
2. Put chopped vegetables onto a rimmed baking sheet in one layer. Use two baking sheets if necessary, like I did:
(It's times like these that I LOVELOVELOVE my double oven!)
3. Drizzle with olive oil and toss to coat. I just use my hands- it's faster- but you can use a wooden spoon or spatula.
4. Put pans into the preheated oven(s) and roast for 20-30 minutes. If you notice the veggies beginning to brown, stir with a spatula. Roast until veggies are slightly browned and mostly tender. Vegetables cook at different rates, so some vegetables might not be cooked through yet. That is OK. Remove from oven(s).
5. Dump all of your veggies into a large pot. Scrape as much of the roasted bits off of the pans- these are full of flavor!
6. Add broth. The amount of broth you need will depend on the amount of veggies you have. Add enough to cover the veggies by about 2 inches. You can always add more later if necessary. For mine, I ended up using two 32-ounce cartons of chicken broth.
7. Turn the burner on high and bring to a boil, then reduce heat to a simmer. Simmer for 15-20 minutes, until all vegetables are cooked through and are tender when tested with a fork. Test your root veggies, such as carrots, as they take the longest to cook.
8. Puree the soup. You can do this in batches using a food processor or blender, however, I use an immersion blender.
I cannot tell you how much I love my immersion blender. If you don't have one, get one! Christmas is coming, so start dropping hints now!
Puree the soup until it is nice and smooth. It may look a bit like baby food. That's what my husband says it looks like, but don't worry- it tastes much better than baby food. Add additional liquids at this stage if necessary.
9. Add salt and pepper to taste. Simmer about 10 minutes more, and it's ready to serve!
I garnished mine with some chopped chives from my garden. My friend Dina recommends swirling in a little goat cheese right before serving. I have not tried this yet, but since there are very few things on the planet more delicious than goat cheese, I'm going to say that this is a really good suggestion!
Now, a few notes about this soup. Through the combined experiences of the gals in my internet group, we have determined a few absolutes about making this soup. One is to always add some apple. Why? Don't know, but it's just not the same without it. It adds depth and complexity and a touch of sweetness to the flavor. Two, always add some tomato. I used fresh tomatoes (the last from my garden), but canned tomatoes can be used as well. If you use canned tomatoes, do not add them to the roasting pan, as that will create too much liquid and the veggies will steam rather than roast. Just add the canned tomatoes in when you add the broth. Three, fresh herbs are wonderful in this soup! I added mine as a garnish, but you can certainly add some before the pureeing step. Thyme, tarragon, a little rosemary, dill, anything you have around would be lovely. You could also use dried herbs, although with those, be careful when adding, because dried herbs are much more potent than fresh, and it's easy to overdo them.
I mentioned that I added garbanzo beans to the soup, and I really loved the results. The beans, when pureed, help make the texture nice and creamy. Including a potato does as well, so if you don't like the idea of adding beans, just make sure you put in a potato or two. The garbanzos contribute a complex nutty, earthy undertone to the flavor of the soup, without having an overwhelming bean flavor. Plus, they are SO healthy- loads of fiber and protein. Try it- even if you're not a fan of beans. You won't even know that they're in there!
The possibilities are endless with this soup, limited only by what veggies you have available. It's a great way to use up veggies in your crisper drawer that are nearing their expiration date and that you might otherwise throw away. If your carrots or celery are a little limp, it won't matter!
I hope you have enjoyed this feature, and I look forward to doing more Kitchen Creations features in the future! I would love your feedback, so please feel free to leave me a comment. I'd especially like to hear from you if you try this recipe- please tell me how you liked it! Also, I'm happy to answer questions if anything in the recipe is unclear.
I'll be posting again soon with some more leaf projects, and I haven't forgotten about the giveaway I promised either, so be sure to check back!
Tuesday, October 12, 2010
Tutorial: How to Press Fall Leaves Using Your Microwave
Since it's fall, and since I have been spotlighting some stuff I've made with dried, pressed fall leaves, I thought I would share some tips with you for doing this at home yourself. There are lots of different ways of pressing leaves, but the microwave is the most expedient of them. I have mentioned before that I have a Microfleur that I use for drying/pressing leaves and flowers, and it is a great product. But what if you don't want to spend the money for a specialized product? There is another way, and that's what I am going to show you today. I will admit that I love my Microfleur, but you can get very similar results by using things that you probably have sitting around in your house right now.
First, let's talk a little bit about the Microfleur and it's components, and what about it makes it work. First, it is microwave-safe- that is an important one! The outer plates are made of a material that does not overheat in the microwave, so anything that you use as a substitute should be microwave-safe. Even some items that are deemed microwave safe still get very hot when heated in the microwave, so you will need to be very careful through the process. Next, there is padding, to absorb moisture that is released from whatever you are pressing. The Microfleur padding is basically a very thick (about 1/2 inch) felt, and there are two. Then there are cotton fabric liners, which are what your flowers or leaves come in direct contact with. Finally, there are two clips that hold the entire sandwich contraption tightly together. That is pretty much it, besides the microwave itself.
So, let me tell you how you can achieve the same or at least very similar results that you get with a Microfleur by using common kitchen items. The main things we need to keep in mind here are 1)sufficient padding to absorb moisture, and 2) pressure, to press the flowers or leaves completely flat. There are plenty of options- you just have to look around your kitchen, and you can probably find something that works. I conducted a test in my own kitchen, and here is what I came up with:
Clockwise from the top left, we have a microwave-safe cooking tray, a microwave-safe casserole dish, paper towels, a rubber band (the kind that comes with the newspaper), a leaf, and a cotton-blend dinner napkin. You could use a tea towel too. I would not recommend a fuzzy terrycloth-type towel, however- it will impress the texture into the leaf. You want to use something with a pretty smooth texture.
Before you begin, check your leaves to make sure there is no dirt or other debris clinging to them. Wipe off any excess moisture with a paper towel.
First, fold two sets of two paper towels into quarters (in other words, put two paper towels together. Fold in half, then fold in half again.) Place on the microwave-safe cooking tray.
Next, take your dinner napkin or towel and fold it until it will fit onto your folded paper towels. Leave it so that you can fold it one more time, once you get your leaves on it. Add your leaves, making sure that they do not overlap.
Fold the napkin over to cover the leaves, then place your other set of folded paper towels on top. You should have a sort of sandwich on the cooking tray: paper towels, towel and leaf, more paper towels.
Now, place your casserole dish on top of the top layer of paper towels. Be sure to center it on the area where the leaves are inside the towel. Stretch a rubber band over the whole thing, strapping the casserole dish snugly onto the microwave cooking tray. This is important for keeping your leaves nice and flat as they are pressed and dried.
Place the contraption into your microwave, and set the timer.
Now, this is where it gets a bit tricky. The timing is going to depend on your microwave wattage, so you will need to experiment to find out what works best. Start with short amounts of time until you see what your microwave can handle. Trust me, you don't want to do it for too long:
I recommend starting with 15 to 20 seconds. Once you get to know how quickly your microwave cooks, you can try increasing the times. After the first cooking cycle, remove and check your leaves. If necessary, put it back in for another 15-20 seconds. Repeat until your leaves are completely dried. The best way to judge is to check the stems, as they are the thickest part of the leaves, and will therefore dry the slowest. As your leaves get closer to being completely dried, you might need to reduce your time to 10-15 second intervals. Once you can break a small piece off the end of the stems, they are done!
Doesn't really look a lot different than it did before it was dried, does it? That's the best kind of leaf!
Remember that different leaves will require different processing times, so some might be done before others. I recommend spreading the leaves out into one layer and leaving them overnight, just to make sure than any excess moisture can evaporate. Then store them in an airtight container until you are ready to use for your craft projects. Dried leaves are very brittle, so handle with care!
This method works for green leaves, as well as flowers, too! Again, cooking times and intervals will vary with the variety of leaf or flower, so experiment carefully to find what works.
Now, I am just an amateur crafter and by no means a professional, so be sure to read your microwave's instruction manual before you try anything like this. Also, be sure that any materials you use in the microwave are microwave-safe, and use pot holders or a towel when removing hot items from the microwave. Safety first!
Hope you enjoyed my first tutorial! I'm happy to answer questions- just post a comment if you have any.
I'm still working on a fall giveaway, so check back for that soon!
Sunday, October 10, 2010
Baby Card #2 and Some New Shop Stuff
Babies, babies, everywhere- at least that's what it seems like! In addition to my brother expecting a new baby, my daughter's best friend is also expecting a new baby sister. Her mom is due in November, so Meredith and I thought we'd get her a little gift for the baby. I decided to support one of my fellow Etsy sellers, so that is where I went in search of a baby gift for little Teddie Renee. I remembered seeing some adorable crocheted hats before, so that is what I went looking for. Oh my, but there are a lot of crocheted hat sellers! The one I ultimately settled on was the Portland Beanie Company. Her work is beautiful, her feedback fantastic, and she's local, too! Here is the gorgeous little hat that we got:
Isn't that just too cute?! Almost makes me want to have another baby, just so I can get one of these hats. JUST KIDDING! Seriously, they come in all sizes from infant to adult, so maybe I'll just have to get one for my daughter. Christmas is coming up, after all!
So of course I made a card, too:
I used the same basic design for this one that I did for Kendra's birthday card, and again used that cute stork paper. I can't wait to give it to our friend!
I've been working a little bit on those new fridge magnets, and actually got a couple of sets of them listed on my Etsy shop. I have a few more to list, and will be doing that this next week. It is nice to start getting my inventory stocked up, especially with some new products!
More to come later- I have some fun things I am working on. One is a tutorial of sorts, and another is a giveaway I'm thinking of doing- so be sure to check back soon!
Subscribe to:
Posts (Atom)