Sunday, May 10, 2015

Finally, Some New Stuff!

I am well into my transition from my previous booth at Top Drawer to my scaled-back focus on my crafting, and it is going well!  I have gotten rid of a number of furniture pieces, and this weekend went through my crafting stuff and posted some crafting supplies that I will not need since I am pulling my attention away from the other crafting activities apart from paper crafts.  It feels good- I do wish I had more time to do the other crafts, but for the time being, it will have to wait.

In the meantime, we had our Salem Etsy Team spring sale last weekend, and it was fantastic!  We had the best traffic we've ever had at an event!  I sold a number of cards, and my daughter Meredith sold some things to raise money for her choir trip. Now that that is over, the pressure is off, and I have time to get things organized and plan for the future.  This weekend, I did some cleaning and organizing, and managed to get in some crafting as well.

I have gotten a number of graduation exploding box orders this year- I just completed my 10th since January, which is a record for me!  I'm very happy that they are doing so well.  Since I got my Silhouette Cameo, I have spent some time creating cut files for my box cards, and it has really made things much easier and efficient for me!  I can now cut out the box layers and panels in a fraction of the time it used to take to do it by hand, and they are much more precise and even in size.  It takes a bit of time to set up the print files in the Silhouette Studio software, but once done, it prints and cuts easily and quickly.  Hooray for efficiency!

For our SET spring sale, I made some new products- some cards, as well as these little reusable gift tags/bookmarks. This is something I have played with in the past- in fact, for the holiday sale last year, I made mini-bookmarks for the swag bag contributions, very cute, with paper snowflakes in them.  This time, I made them with pretty washi papers and added on a blank white square to the backs with temporary adhesive.  They can be used as a gift tag, then remove the white square to use a as a bookmark after.  I sold a few at the spring sale, and just today listed some in my Etsy shop.  We'll see how they do- I realize they are kind of different!  I really like them though:


I especially love that bird and foliage paper in the first photo- I have made some cards with that paper, and just love it!

Also just listed a few new cards in my shop:


I got a few new washi papers back in December, so used some in these. I really love that peacock feather pattern paper!  The pink/white quatrefoil is not washi paper, but I really like that pattern- it is geometric without being too blocky and regular, and it looks nice paired with a flower.  I just got an embossing folder with a quatrefoil pattern, so will be experimenting with that soon.

It is nice to be focusing once again on my paper crafts!  Looking forward to doing more.  I recently ordered a bunch of new washi papers from a seller on Etsy, and these are in patterns and colors I have not used before, so should be fun to work with!

Sunday, April 12, 2015

Catching Up and Changing Direction (Yet Again)

Wow, I can't believe it's been since Christmas that I last posted!  I guess I have been otherwise occupied.  Family obligations have taken up a lot of my time and focus in the last few months.  My dad passed away in November, and though he didn't want a service, I took my kids to the other side of the country over spring break to visit my step-mom and other family members, sort through photos and other things of my dad's, and spread his ashes in the mountains.  It has been a different, and sometimes difficult, time, and has definitely affected the time I am able to spend on crafting and my Etsy and other craft businesses.

Lately, I have had to reassess my commitments and make some decisions about them, because I have been feeling spread very thin.  I did not do the Jane Austen Faire this year for this reason, and am kind of scrambling to fulfill other commitments.  So, I have made the difficult decision to give up my booth at Top Drawer Upscale Resale and Boutique, as much as I have loved having it.   I am not leaving Top Drawer altogether though- I will be keeping my card rack there, which will only cost me half of what my booth fee has cost.  I have found that I have been spending way more time and effort on the "supplemental" things in my booth than I have on cards, which were the main things I wanted to sell there.  In fact, they are my best selling items there, so removing my focus from them has been a disadvantage all this time.  Making this decision has been very freeing- I feel better than I have in months, because I do not have all the pressure that I have been putting on myself any longer.  I have really enjoyed refinishing furniture and making the other items that I have done, but I simply do not have the time for everything at this stage of my life.  Maybe in a couple of decades when I don't have to work full time and have 2 teenagers to raise/guide!

SO...I am in the process of clearing out my garage of the furniture I had stockpiled to refinish.  I have gotten rid of a number of items already, and it feels great!  That's how I know that I have made the right decision.  In the meantime, I have been working on some new cards, for my card rack at Top Drawer, as well as in preparation of the Salem Etsy Team Spring Sale, which is scheduled for May 2nd.  I don't have much made yet, but hope to crank out lots of Mother's Day cards in the next couple of weeks.  Also, my daughter is still raising money for her choir trip next month, so will be making some items to sell there.  She'll be making some seeded gift tags (gift tags with flower seeds that can be planted to grow flowers), bird seed cakes in fun shapes that can be hung from trees, and pretty clothes pin magnets.  All of the proceeds from those items will go toward her trip to Seattle, which is coming up quickly!!

I have learned a lot in the last few months, not the least of which is what my personal limits are.  There may be things that I want to do, but those must be balanced with what I *need* to do.  It is a delicate balance, and as every working mom knows, is a moving target- no 2 weeks are exactly the same.  While I am sad to have to give up some things for the time being, I feel really good about moving forward in a way that will not create so much pressure on me, and I can enjoy my craft again.  My graduation exploding boxes are currently, well, exploding!  I have already done more orders so far this year than I did all of last year, and the momentum seems to keep building!  It is nice to once again focus on my Etsy shop, since I have had little time for it since having my booth at Top Drawer.  Hopefully the decisions I've made to scale back will benefit every area of my life and business(es).  I will be able to focus on what sells the best at Top Drawer, which is the cards, and my most popular product on Etsy, the exploding box cards.  And not go crazy in the process- it's a win-win!!  I am excited that I have been able to reduce a lot of my physical labor on the exploding box cards by using the Silhouette Cameo, and look forward to making more efficiency changes in the near future.

So- onward! :)

Friday, December 26, 2014

Happy Holidays!

Happy Holidays, everyone!  Santa came to town, and look what he brought!


Wishing you good cheer and blessings for the New Year!  I am looking forward to a new year of creating great things, and sharing theme here with you.  Can't wait to start making some new stuff in 2015!

Sunday, November 9, 2014

New Fall Items

Looks like I have some catching up to do!  Whew, time sure flies- it does not seem like it was nearly a month and a half since I last posted!

Well, I continued my fall product development with this:
Isn't this cute??  It's a wreath made from a picture frame, embellished with faux fall foliage.  I got this frame at a garage sale for all of 50 cents, and painted it with paint I got at Lowe's from the clearance section.  I added a burlap bow on the bottom.  And in the center- a chalkboard that I made myself.  I bought a plaque at Michaels and painted the edges with acrylic paint, and the front with chalboard paint in a dark brown. So yes, it's a chalkboard!  I hung it from the frame with twine, keeping with the rustic look.  I really like how it came out.  I put it in my booth at Top Drawer, and I hope I sell it!

The other exciting thing that happened last month is that I had this great custom order from a customer in Dubai, United Arab Emirates.  I had never shipped to that part of the world before, so was not sure what to expect.  The customer, Raeed, was a really nice guy who was purchasing a custom graduation exploding box for a very close female friend who was graduating from college.  I communicated a lot with Raeed on the design of the box, and because of the high number of personal words and phrases he wanted to use, I proposed the idea of creating a word collage for part of the box.  He loved the idea, and I got to experiment!  I really like how it turned out.


He gave me enough material for me to create two word collage panels on his box.  They are the larger ones on the outer layers.
Kind of hard to see those text panels, so here the are up close:

I mixed in some graphics, and I think it makes it fun.  Raeed seemed really happy with the final product.  I was very happy that he was happy!

I am currently working on some new holiday stuff, both for the Etsy shop and my booth at Top Drawer.  In addition, the Salem Etsy Team is planning our annual holiday sale, so am coordinating that again.  This time, I have some help- yay!  We have brought on some new people to help with marketing, vendor coordination, and other tasks, so that I am not doing everything myself!  The volunteers we have brought on are doing a fantastic job so far, and I think this will be our best  holiday sale yet!  This year, I will not be selling my own products.  Instead, I am giving my booth over to my daughter Meredith, aged 14, who is looking to raise money for her choir trip to Seattle in May, for which she has to earn half of the cost.  They are doing some fundraisers at school, but this is a great additional opportunity for her to earn some money.  She has been hard at work making glitter ornaments, gift tags, holiday decor items, and more!  It will be kind of different for me this time to have a role only as a sale organizer and not a seller, though I will be there to support Meredith on the day of the sale.  But as she is making most of the items for sale, and will be manning the booth, all proceeds will go toward her choir trip, so I want to let her head it all up.  I know she will do a great job!  We have some great new items that we will be debuting at the sale...stay tuned here for previews!

Sunday, September 28, 2014

More Fall Stuff

This week I did a couple more fall cards.  You know...I LOVE flowers, that is not a secret, given what most of my cards and bookmarks look like.  But wow, it has been so much fun to work on something a little different!  I have had a blast experimenting with some of the fall themes in my cards!  I just love fall-colored leaves, so it has been great to be creative with that theme.  This week, I tried my hand at making pumpkins on a card, and I like how it came out!
 These are actually pretty easy to make.  The one on the left is 3 die-cut circles with an oval in the front.  The one on the left is 3 ovals.  They were cut out of a pumpkiny orange paper, and then I inked the edges with a darker orange dye ink.  The leaves were from fall leaf punches, and I even cut thin strips and curled them with a quilling tool to make whatever that curly thing is on pumpkin plants.  All of this set on an embossed background.  I also made another leaf card today, since the similar one that I had at Top Drawer sold this week.
I used the same leaf punches on this one that I used on the pumpkin card, instead of the maple leaf punch that I had used on the previous ones. These leaves are a bit smaller, so there was room for more.  I figured out on this one the easy way to ink the leaves: ink a piece of paper, then punch the leaves from it, rather than inking the individual leaves.  Duh!  Not sure why I didn't think of that before!

Yesterday we had a great meeting of the Salem Etsy Team to talk about team structure and the upcoming holiday.  It was nice to see everyone!
It was so much fun to see new and familiar faces!  We haven't gotten together in quite awhile, and this really made me think that we need to do it more often!  We are making plans for our holiday sale and doing some neat new things too, like workshops.  Can't wait to see what we all come up with!

Finally here is a picture of the co-captains (Me and Megan, of Phytotherapy) after the meeting, when we both stopped by Top Drawer to fluff our booths.  We are SO ready for fall- bring it on!!
Oh!  And check out the great new Salem Etsy Team blog!  We just launched it this weekend, and can't wait to do more with it!  http://salemetsyteam.blogspot.com


Sunday, September 14, 2014

New Fall Cards

I'm so excited to have some fall cards to post about!  The other week, a Tim Holtz Sizzix tattered leaf die that I had been eying went on sale on Amazon, so I finally bought it, along with some stamps and embossing folders, both fall leaf-themed.  My package finally arrived on Friday, and I couldn't wait to get to work!  It took until today, but I spent some time playing with my new toys and made a few cards.  Love the fall colors, even though summer is not over yet...in fact it is in the 90s here today, ughh!  Well, looking at these cards makes me look forward to fall!

This is a design I have made before, waayyy back when I first started making cards, and was a member of PBS Swappers.  There was a fall card swap, and this was the design I made.  It was fun to get my fall color dye stamp pad and leaf stamps out again!  This one features a punched leaf that I stamped with one of the new stamps I got- I love the veiny look, just like a real leaf!

This one has two layers that are embossed with mixed fall leaves, and two leaves in the center.  One is cut from my new die, stamped with a stamp, and embossed, while the other is from the same punch as the first card.


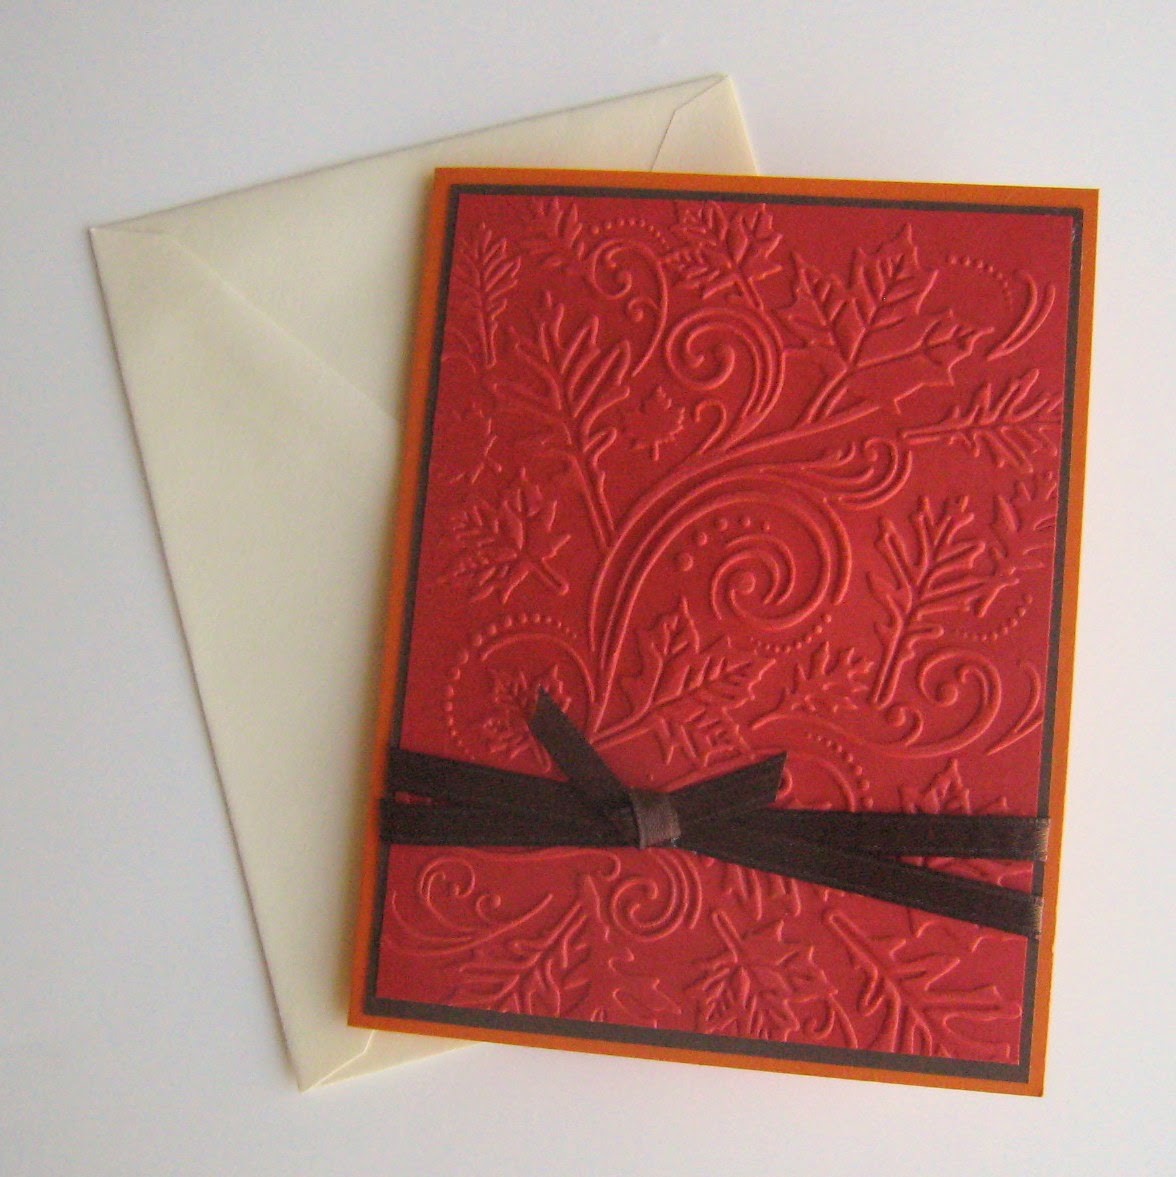
The above two are simple, embossed cards- found this fun fall leaf embossing folder at Joann's awhile back.

Another card featuring a die-cut, stamped, and embossed leaf, as well as some jute ribbon.


I really like these two!  The trees are embossed, and then I added some punched maple leaves, which I stippled with dye ink in fall colors. These are mounted on the cards with foam tape, so they are raised, and sort of float above the card.

These will be going to Top Drawer Upscale Resale and Boutique tomorrow, along with the Paris bookmarks, and some pressed fall leaf bookmarks that I've had hanging around for awhile.  Time for fall to come to my booth!  Next time, I am looking forward to making some cards that feature pumpkins...I've seen pumpkins made by layering die-cut ovals and circles, so look forward to trying it!

Friday, September 12, 2014

Paris Bookmarks

This past week, I stopped by Top Drawer Upscale Resale and Boutique to "fluff" my booth, and while I was there, I fell into conversation with a woman who was shopping there, assisted by Krissy, the owner.  The woman was looking for Paris-themed items for a charity event- she was sponsoring a table, and had to decorate it with a theme, which in this case was Paris.  She was interested in some bath teas by my fellow Salem Etsy Team member/captain, Megan, of Phytotherapy, and was looking for other small items.  Krissy asked me if I had anything, and I said that while I didn't have anything currently, I might be able to design a laminated bookmark with that theme.  The woman was interested, and I gave her my card and told her to let me know if she wanted to talk about doing something.  Long story short, Krissy contacted me and passed along the woman's phone number, I called and left her a message, but alas, I did not hear back from her.  I imagine she probably changed her mind, or found something else to use.  She had been looking for small gifts for each of the 8 seats at the table, and I am sure there are plenty of things out there that would be lovely for that purpose.  Easy come, easy go- I am used to getting inquiries that do not pan out by now.  It's disappointing, but I don't take it personally.

Well...sometimes when I get an idea in my mind, I can't let it go until I actually do something with it, and this was another one of those cases.  I had done some research and had found some neat digital images that I had thought I could layer for a sort of Paris-themed collage.  I stopped in to Top Drawer again today, and Krissy said that even though the woman did not call me back, she thought I ought to make a few items anyway- she said the Paris stuff flies off of the shelves there.  That was all the encouragement I needed!  I spent some time this evening working on my idea, and I'm pretty happy with how it turned out!
Here is the front.  Let me break this down: the background is an image from a vintage postcard written in French, and I lightened it up considerably so that it made for a softer background.  I then layered on other images: a Paris postmark, an image of the Eiffel Tower, a fleur de lis, some roses, and a butterfly.  I like it!  On the back, I put on some paper in a black and white damask pattern that looks a bit like fleur de lis.
I also managed to get my shop name on the bottom of the back- you can barely see it down there, but it's there!

I have never done anything quite like this before, and I am pleased with my first attempt.  I actually had to print it in two separate layers, the background first, and then the items that are on top of it.  I set up the layout in Power Point in two separate slides and printed them one at a time, so that the top images printed right on top of the background.

Next up I will be working on some fall-themed cards- I just ordered some stuff from Amazon and can't wait to get it and play with it!


Sunday, August 24, 2014

More New Cards

Well, I decided that I liked that new card design that I came up with for my sister's speedy recovery card that I used it on a few other new cards!  I wanted to make a few more birthday cards for kids, so I did a couple each for girls and boys.
I did this one in the large (5x7) size.  I still had some of the floral and striped papers left, so I made two smaller A2 cards next:

Here are the boy cards:

Cute little car and truck pattern, and lots of neat colors to use!

I also made a "thinking of you" card with some papers I've wanted to use for awhile but haven't had the chance.
I don't recall where I found this paisley paper, but I suspect it was probably Craft Warehouse.  I think I got the argyle paper from Scrapbook.com when I ordered some papers to use for Valentine cards, but I never got around to using this one.  Anyway, I like the combination of these papers together- yes it is busy!  But I love how the colors mesh.

So I'm still plugging away at the cards and building up my inventory at Top Drawer.  I'm afraid my poor little Etsy shop is starting to feel neglected! I do need to try to get some new things in there soon.  I actually do have some of the thank you cards from a few weeks ago that I reserved to list in my shop, but I haven't had time to take photos and do the listings.  Hopefully soon!  I still have not sold that little table that I painted a few weeks ago- I just marked the price down and did some promoting on Facebook, because I really would like to get it sold.  I scored some new furniture pieces at a garage sale last weekend, and have already started working on one of them.  Fortunately I have made my booth fee and then some already for this month- yippee!


Sunday, August 17, 2014

Speedy Recovery and Baby Cards

Just a few new cards that I have made lately.  First is one that I made to send my sister, who had surgery last week.  I used some paper that I got at an estate sale- a pack of Stampin' Up paper that all coordinates together, so it's very easy to match papers to make a pretty card.
Lately, I have been trying to take my cards to the next level by using a variety of fonts and font sizes on my sentiments.  I see a lot of that on commercially-produced cards, as well as on handmade cards that are stamped.  I print mine on the computer, and have been making use of more fonts, and I think it makes it more interesting.  Anyway, this card has a rich dark brown base and has green and blue floral papers layered.  I also put a strip of striped paper with a bow going across it, just to add some interest.  I tried something different this time with offsetting the paper layers, and I really like this- you can see the pattern on the bottom paper so much more than if the top one was centered!  I will be using this design again for sure.

Next I have a couple of baby cards.  This is my second batch- I forgot to take pictures of the first ones I made, which were for baby boy and baby girl.  The new ones are just generic baby cards and can be used for either sex.  I found this cute circus animal paper and coordinating striped paper at Joann's.
I again used the offset design, so that you can see the striped paper better.  These are A2 size cards, and I didn't want the sentiment box to dominate them, so they are small- just 2x2.  I used a scalloped square punch for the border.

What's next?  Not sure yet!  I have been making my way through a list of card types that I want to get stocked in my booth at Top Drawer, and have made good progress, but there are still a few that I want to get more of in there- sympathy, thinking of you, congratulations, anniversary, and some seasonal cards as well.  The holidays are just around the corner!  I have some holiday cards from the past couple of years that did not sell at my craft shows, but will be making a few new ones too.  Not too many, since single cards do not sell very well, but I do enjoy coming up with new designs.  I also want to do some fall cards- I got a couple of new embossing folders during a sale at Joann's and one is a pretty falling leaf one that I am looking forward to using.  Also, my husband and I scored some neat stuff at a garage sale yesterday, including two small tables and a couple of wall-mounted shelves that I plan on painting.  I am going to work on one of the tables first- I got a small jar of chalk paint at Michael's this morning that I am going to use on it, and I am curious to compare the results to the table I painted with the chalk paint that I made by mixing flat paint with Plaster of Paris.


Sunday, August 3, 2014

Wedding Cards and Painted Jars

Still beefing up my inventory at Top Drawer Upscale Resale and Boutique- I'm trying to get more types of cards in there for different occasions.  Last week I did some thank you cards, and this week I focused on wedding cards.  I took a couple in last week- these are a new embossed design:
It's a pretty simple design, monochromatic in either white or off-white, with the edges inked with either gold (on the off-white) or silver (on the white).  I saw this idea of inking the edges on Pinterest, and came up with my own design using that concept.  I used a script font on both the sentiment box on the front, and the message in the card:
So those were last week's wedding cards.  Here are this week's:


Unfortunately, the light was not great when I took these pics late yesterday afternoon, so the coloring is a bit off, even after correction. The first one is white with salmon, embossed with a poppy design.  I did my best to create a 3D poppy, and I am happy with how it turned out!  I used the Tattered Flowers die from Tim Holz (Sizzix) for the larger flower and the outer inside layer, then a sun punch for the inside, and put some tiny gold pearls on the inside.  I used an embossing tool to create the striations on the outer layer.  The other two include a light blue daisy, and a mauve rose (which I made with the Spellbinder 3D rose die.) The sentiment box is elevated on all of these with foam adhesive.  I printed the sentiment on the computer.  I have been working on using a mix of fonts on my sentiments to make it more interesting, and I like it!

Next up is some more painted mason jars.  These are pretty popular right now, in fact mine are not the only ones that are being sold at Top Drawer right now.  Pinterest is full of them, and finding a new angle on them is not easy.  However, I saw something on a blog last night and had to try it myself: denim-wrapped mason jars:

I used a pair of old jeans and cut strips to wrap around the painted jars. I used the crackle painting technique with Elmer's glue, for a distressed look. On the first, I painted it a dark yellow and accented it with a white ribbon and white paper daisy with a yellow button center.  I love the combination of the yellow with the denim!  The second one is lavender, and I made two rosettes with strips of denim.  They were my first attempt, and they turned out ok, but I think I can use more practice!  I worked on some more this morning, and they turned out much better.

Finally, here is a third jar that I did with burlap, along with a burlap rosette:
Burlap is a lot harder to work with because of the loose weave, and the fact that the edges fray very easily.  It is easier to use thin strips of material to roll the rosettes, however with the burlap that is hard to do because the edges fray from both sides, leaving you with more frayed edges than material in the center.  I will keep working on my technique and try some more.  I did try one using jute ribbon, which has finished edges, so I thought might be easier, but it wasn't because it is also much more stiff and less flexible than burlap.

I took everything down to Top Drawer today, and also brought some new signs to put on my card rack for the different card sections.  It's a work in progress- I'll keep working on it, but it's a start!


Check out the new crackle painted frames above- the photo quality is not great since it is from my iPhone, but I love how these look when they are done!  The one on the left has a base coat of a dark salmon color, with a top coat of light pink.  The one on the right is aqua with white over it.

The big Grand Opening celebration at Top Drawer is this Wednesday, so I guess I am as prepared as I can be at this point!  I will continue making cards and trying to increase my inventory.  I got some new papers yesterday, several which are baby themed, so that I can make some baby cards.  Those will be fun!