Well, time had a tendancy to fly, doesn't it? At least for me- I was stunned to see that it has been nearly 2 months since I posted anything here! The end of summer came rather quickly for me, and as busy as it normally is, it was complicated by the fact that my 16 year old son contracted mono two weeks before school started. So yes, the end of summer was busy enough with getting two kids ready for the start of school, and then I got to play nursemaid as well. Thankfully he was over the worst by the first day of school, but is still in recovery mode. My daughter started middle school, so there were all of the adjustments to make with the new environment there. And then, right on schedule, we all got sick by the second week of school with a nasty cold. It was enough to knock me out of commission for most of last week, which is unusual. Hopefully things will ease up now, and everyone will settle down into the new routines of fall.
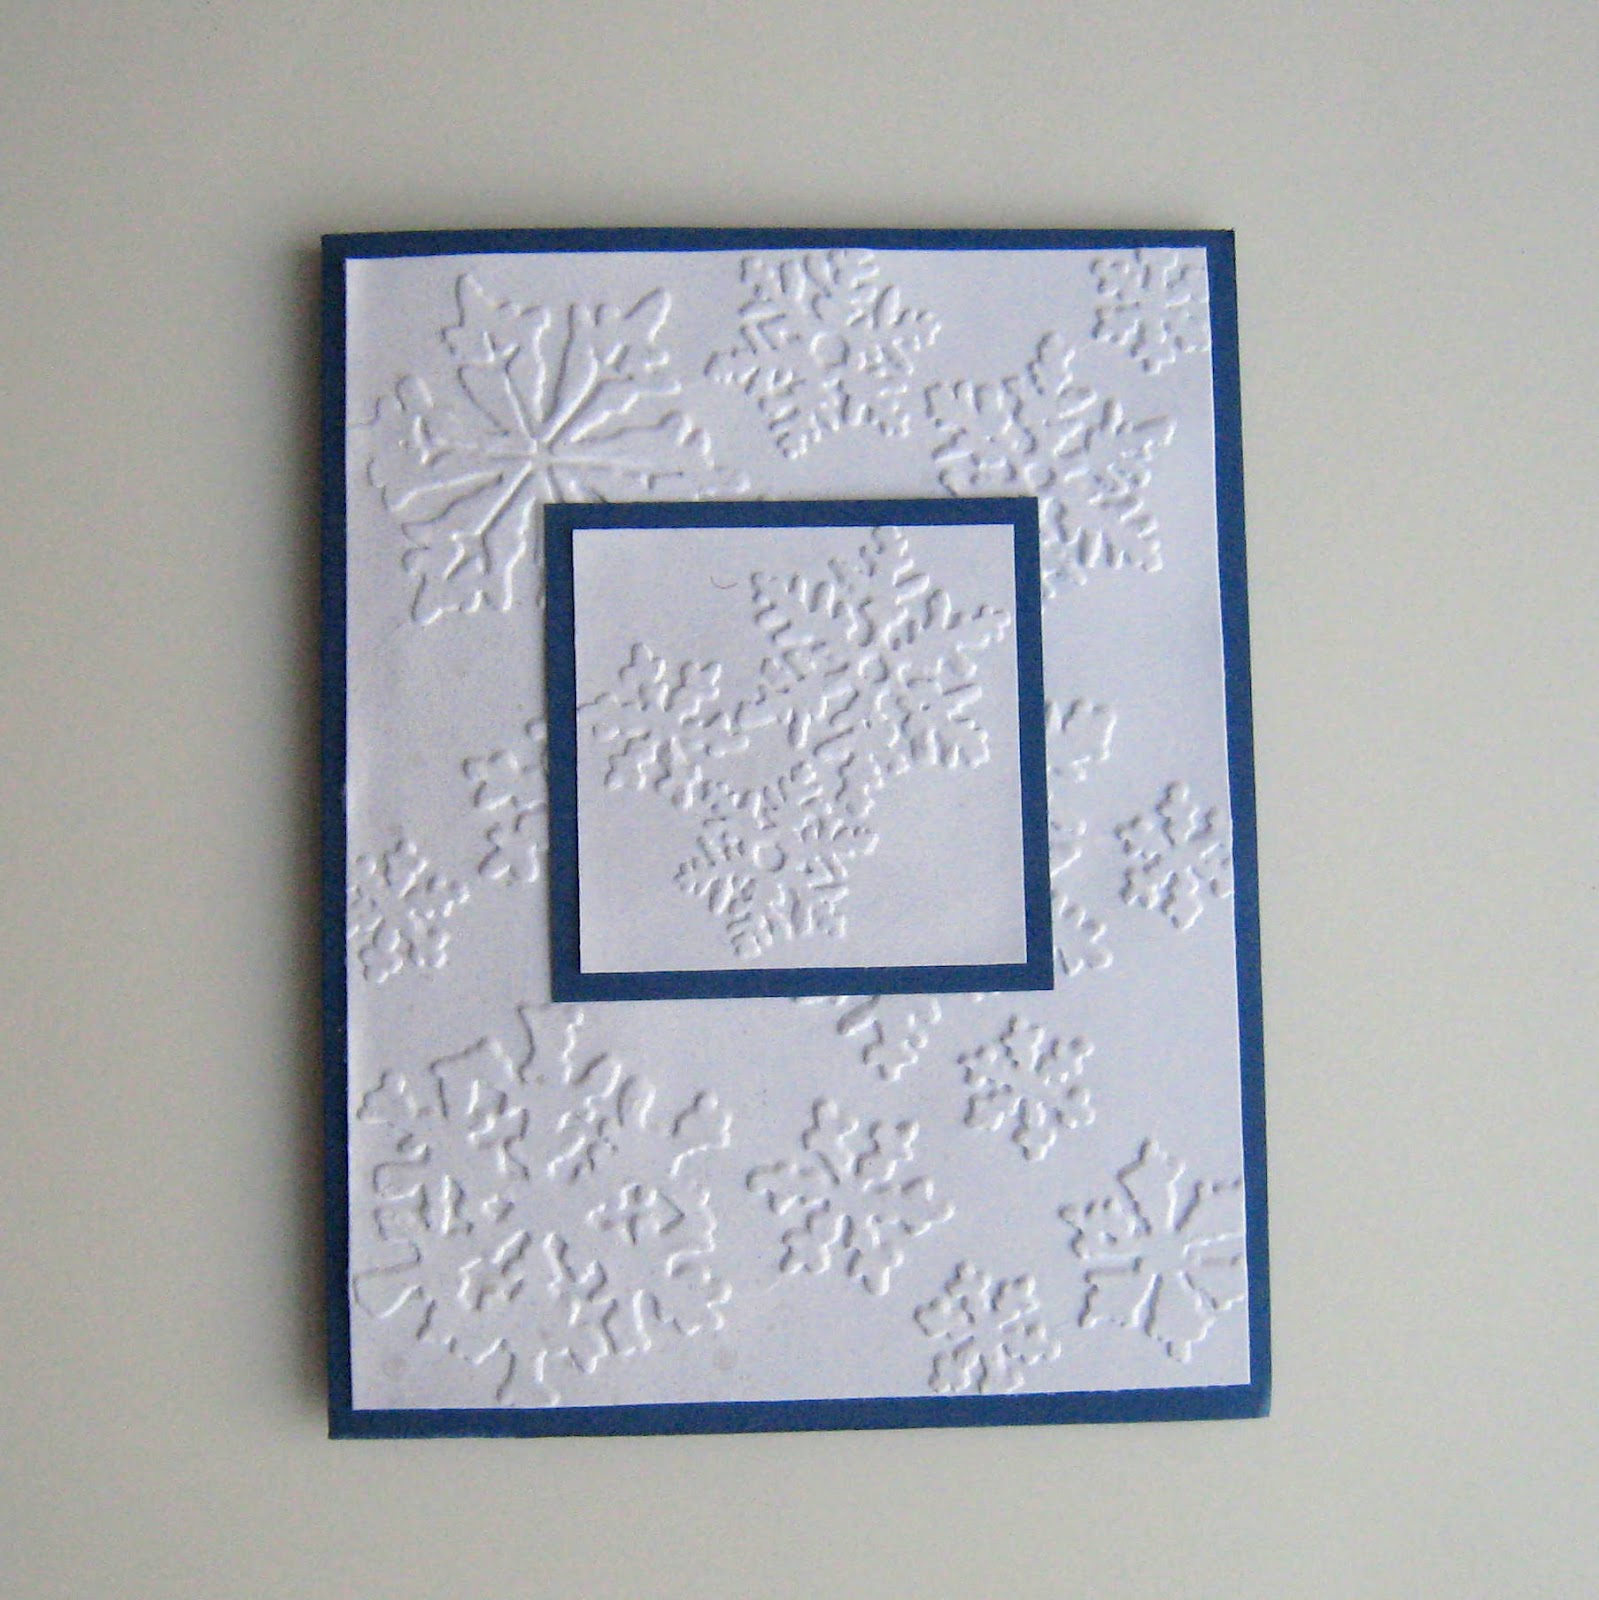
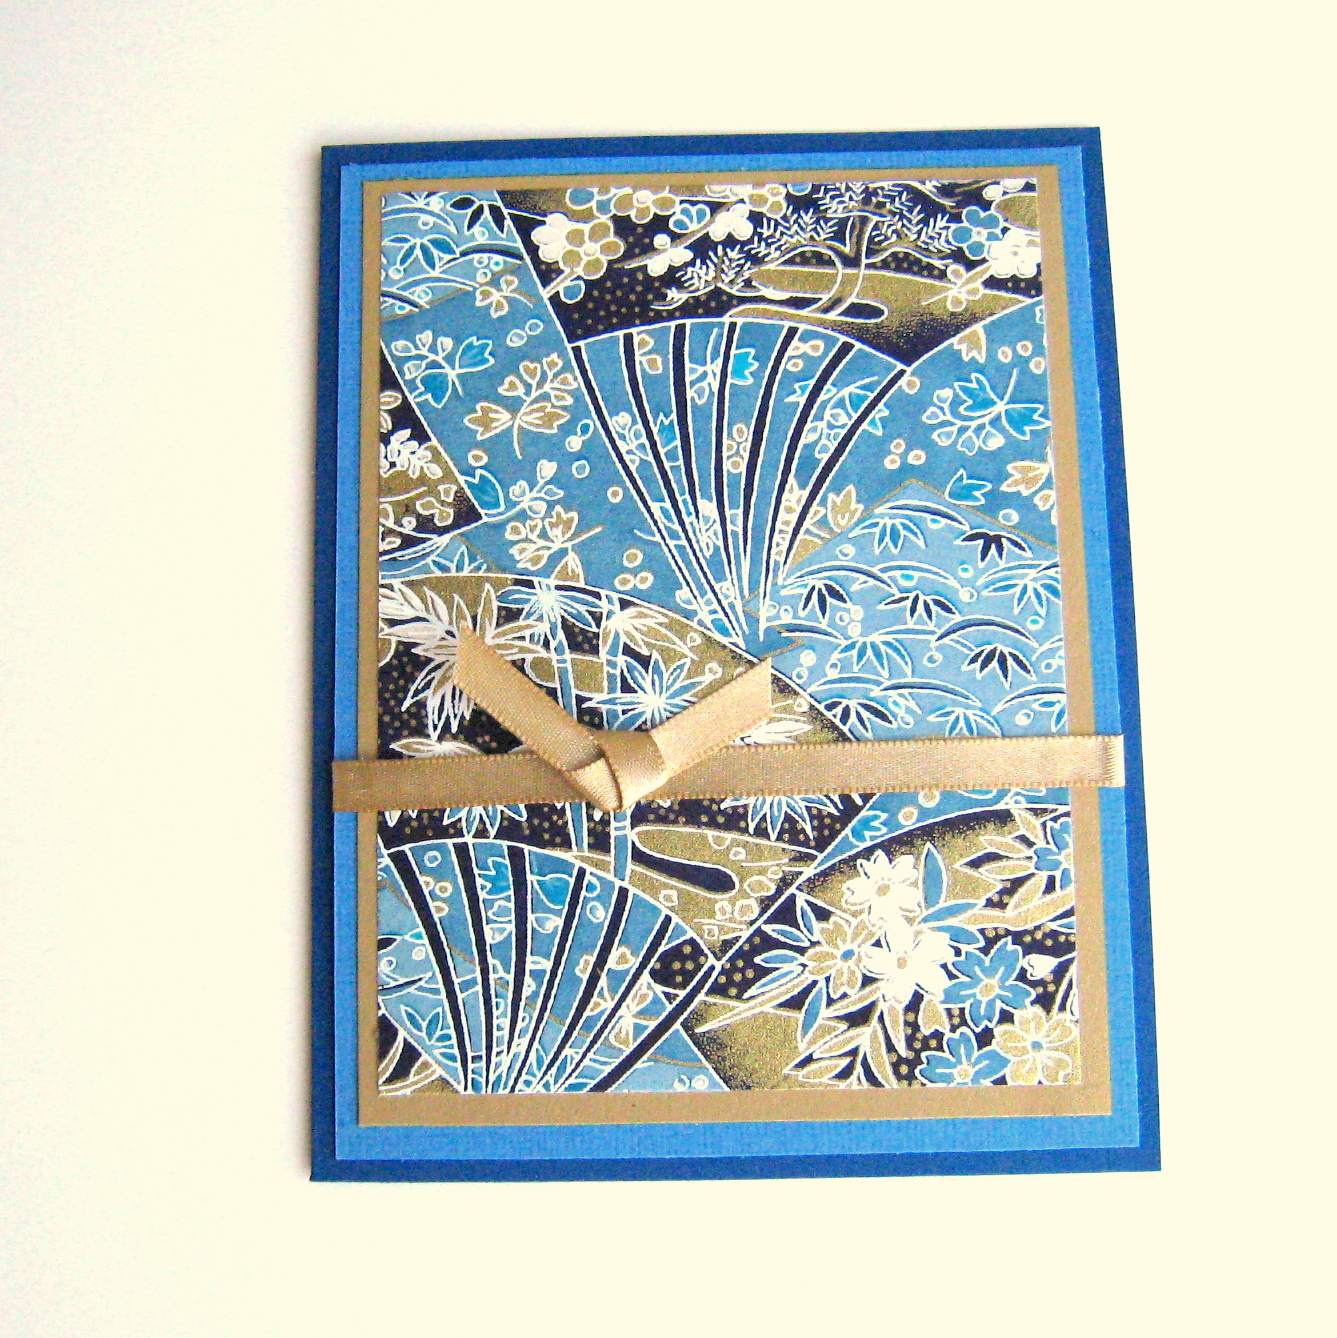
In my business with everything, I had not had any time for crafting lately, so did not really have anything to share. However, in the last week, I have (perhaps insanely) agreed to participate in a holiday bazaar put on at my son's high school by a woman from the Oregon Women in Business group, with which I became affiliated last spring, after I attended one of their local events. My very good friend Erica was at that event selling toffee that she and her wonderful hubby Matt make in their business, Broken Top Toffee, and I got to talking with Gillian, the woman who had coordinated the event. I gave her my card and became member of the organization's Facebook group, so heard about the event when it was first announced. It is going to be a very large event. At first, she estimated 50 vendors, but it seems that the high school can accomdate twice that, so she is shooting for 100! Now, I have only done two sales before, the largest of which was the Salem Etsy Team Spring Sale in May, and that was only about 25 of us, so this is going to be substantially bigger. I must admit, I am just a bit intimidated! But, I have a few weeks to prepare. The event is slated for Saturday, November 10th, so I have the next 6 weeks to prepare. It's a holiday bazaar, so that means having holiday items for sale, and that is what I am hard at work on at the moment. Every year, I think that I should really start making some holiday items in, oh, June or July, but I never do get around to it. Now that I have a fire under me, I have been cranking out the holiday cards like nobody's business! Here is a sneak peak at a couple fo new items that will be for sale on November 10th.
These cards are dry-embossed using embossing folders, and I think have a simple elegance about them. The inside will have a simple "Merry Christmas" or "Happy Holidays" sentiment, but otherwise leave the rest blank for personal messages.
I have plans for other products, and those plans are going to keep me busy right up until the bazaar. I plan to do some other holiday cards using patterned papers, as well as some gift tags. I am also going to again attempt some magents. My daughter and I tried these for the spring sale, but had rotten luck then. There were two types: the laminated ones that I've done before, and a new type, made with clear glass stones with pressed flowers glued to the underside, so that they show through. They were lovely...except that when you attach the magnet to the back, it falls off, because there is nothing to protect the pressed flower. When I was at the spring sale, I talked with a gal who makes jewelry using glass pieces, and she told me about a produt that she uses called diamond glaze. I tracked some down, so I am going to attempt those magnets again and see if that glaze will help make it a success!
I also have a few birthdays on the horizon to prepare for. My BFF Kendra's birthday is October 7th, my step-mom's birthday is the 26th, and my mom's is in mid-November. So I am also thinking ahead to those. I always enjoy experimenting with differnet card designs for family birthdays, so this is a chance to have some fun with something different! That will be nice since I am cranking out holiday cards of similar designs in volume.
I need to get back into the swing of things, and that includes reviving my Facebook page. I kind of let it go by the wayside for the last few months, but shockingly, I got notice of a new follower a few days ago! Well, to that individual, thank you, and I will endeavor to make it worth your while! Look for an update very soon!
I will be back soon to post an update on my progess on preparing for this big holiday bazaar. My mind is bursting with ideas, and the past couple of weeks I have been shopping for supplies and can't wait to dig into them and start playing with designs!
Sunday, September 23, 2012
Monday, July 30, 2012
New Birthday Card and Bookmark
Still haven't had much time to work on new stuff for my shop, but I did make a card and bookmark for a friend of my daughter who is having a birthday soon. She is going to have to miss her friend's party, since it is during the week we will be on vacation, but we wanted to get a gift anyway. We got a gift card to a shop she likes, and I made a card to put it in. This friend of my daughter is a friend from dance, and throughout the last year, there have been several birthdays among the group, and I have not repeated a card design yet, so had to do something different this time too! The design on this card is one that I ripped off from the one my BFF Kendra made and sent me for my birthday this year! I really liked it because it is different and unique. It was not too difficult to do, but it is impressive in presentation.
So, it is a tri-fold card, with the flaps folded into triangles. Then an embellished panel is adhered to each triangle, and they overlap when the card is folded up, with a ribbon closure on the outside. We put the gift card on the inside with some temporary adhesive. Folded up, the card is 4x4 inches. Cute! I used some paper that I have used before on cards for my daughters friends- it is very cute for tweens, I think!
Here's the bookmark, which I made to coordinate with the card:
I used coordinating light turquoise and purple flowers and papers to go with the peace sign and hearts paper. Though I don't have a picture of it, I have bundled the card and bookmark up into a clear cellophane bag- the same type that I package up my cards in that I sell in my Etsy shop. It looks cute! We'll secretly give the gift to Alexa's mom this week at dance class, so that she can make sure that Alexa has it during her party, even though we won't be there.
Hopefully once we are back from vacation, I can get to work on some new stuff for my shop! I also want to try out some new photo ideas for my items...I have to admit that photography is my least favorite thing about running my shop! The Salem Etsy Team had a great meeting last week that I was able to attend, and I got some very good feedback about some ideas for staging and photo techniques that I want to try soon. See you in a couple of weeks!
So, it is a tri-fold card, with the flaps folded into triangles. Then an embellished panel is adhered to each triangle, and they overlap when the card is folded up, with a ribbon closure on the outside. We put the gift card on the inside with some temporary adhesive. Folded up, the card is 4x4 inches. Cute! I used some paper that I have used before on cards for my daughters friends- it is very cute for tweens, I think!
Here's the bookmark, which I made to coordinate with the card:
I used coordinating light turquoise and purple flowers and papers to go with the peace sign and hearts paper. Though I don't have a picture of it, I have bundled the card and bookmark up into a clear cellophane bag- the same type that I package up my cards in that I sell in my Etsy shop. It looks cute! We'll secretly give the gift to Alexa's mom this week at dance class, so that she can make sure that Alexa has it during her party, even though we won't be there.
Hopefully once we are back from vacation, I can get to work on some new stuff for my shop! I also want to try out some new photo ideas for my items...I have to admit that photography is my least favorite thing about running my shop! The Salem Etsy Team had a great meeting last week that I was able to attend, and I got some very good feedback about some ideas for staging and photo techniques that I want to try soon. See you in a couple of weeks!
Sunday, July 22, 2012
Masculine Birthday Card
Whoa, I didn't realize it's been nearly a month since I last posted- whoops! Guess I have been busy! I have not done a lot of crafting lately, so there hasn't been much to report. I did a couple of birthday cards recently though, because we had two parties going on yesterday. One was for my daughter's friend's birthday, and unfortunately, I did not get a picture of the card I made for her. It was like this one though- just a different color scheme (I did purple, pink and green). The other card was for my hubby's cousin Adam, who turned the big 4-0 on Friday. There was a big luau party in his honor yesterday, and it was sooo much fun! It was at my hubby's uncle Bob's house, where they have a large lot and a nice swimming pool. They roasted a pig in the ground and had some amazing side dishes to go with it- lots of great food, great company, and great times! My hubby went in with a friend to get Adam a nice camping chair, and as it happened, it had a camoflauge design on it. So here is the card I made to give to Adam with the chair:
I never have an easy time with masculine cards, and lately it seems like I've had to make a lot of them! I wish there were more masculine patterned paper choices out there- I have a very hard time finding papers that are appropriate for men. Even if I find a paper in nice masculine colors, it tends to be in a floral or paisley or otherwise feminine pattern! That's why I usually end up going with stripes, as that is all I can ever seem to find. Camoflauge of course is the exception, though I hate to use that for everything since it can get a little cliched. There was a guy who used to hang around the Etsy forums a couple of years ago who started a blog called "Metsy", and it focused on Etsy items for men. He used to make fun of things that people would make for men in a camoflauge pattern, as if that would make an otherwise non-manly item masculine. Wonder what happened to that guy? He was pretty entertaining, even though he DID trash on my camoflauge bookmark!
Anyway, I digress. Cliches aside, I feel the camo was appropriate in this case, as Adam does hunt and camp, and the pattern went with the chair too. He seemed to like it- I just hope it wasn't the beer talking, lol! I used a solid dark army green card base and then layered three offset layers of torn-edged paper. It gives it a sort of rougher edge to the look of the card. I used torn-edged paper on the inside as well. Overall it's a pretty simple design, but kind of different. I kind of like the offset look- I may have to try that on some other cards as well.
I also recently made a set of cards for my hubby's friend's mom- she is the one who has the beach house that we stayed at for our anniversary this year, and I made a Thank You card to send her. She liked it so much that a few weeks later, she put in a huge order for some cards from my shop! We are going to be staying at the house again for a week for our summer vacation next month, so as a thank you, I made a set of notecards for her in different washi paper patterns. Here are those:
For a couple of these, I used paper that I bought from an Etsy seller that I found who brought a bunch of washi papers back from Japan. She makes lovely boxes and other things that she covers with the paper, and sold some of the scraps as supplies. I bought two batches from her awhile back, and had hoped to go back for more, but recently I checked her shop and it was almost all gone! :( Well, hopefully she will restock!
Not much else on the agenda for the time being. We're getting ready for vacation, and after that it will be time to get the kids ready to go back to school. How time flies! I have been mulling over the idea of making more occasion-specific cards for my shop...the blank cards don't seem to sell that well from what I've heard from other sellers. So maybe I will try adding specific sentiments to some and see how that goes.
I never have an easy time with masculine cards, and lately it seems like I've had to make a lot of them! I wish there were more masculine patterned paper choices out there- I have a very hard time finding papers that are appropriate for men. Even if I find a paper in nice masculine colors, it tends to be in a floral or paisley or otherwise feminine pattern! That's why I usually end up going with stripes, as that is all I can ever seem to find. Camoflauge of course is the exception, though I hate to use that for everything since it can get a little cliched. There was a guy who used to hang around the Etsy forums a couple of years ago who started a blog called "Metsy", and it focused on Etsy items for men. He used to make fun of things that people would make for men in a camoflauge pattern, as if that would make an otherwise non-manly item masculine. Wonder what happened to that guy? He was pretty entertaining, even though he DID trash on my camoflauge bookmark!
Anyway, I digress. Cliches aside, I feel the camo was appropriate in this case, as Adam does hunt and camp, and the pattern went with the chair too. He seemed to like it- I just hope it wasn't the beer talking, lol! I used a solid dark army green card base and then layered three offset layers of torn-edged paper. It gives it a sort of rougher edge to the look of the card. I used torn-edged paper on the inside as well. Overall it's a pretty simple design, but kind of different. I kind of like the offset look- I may have to try that on some other cards as well.
I also recently made a set of cards for my hubby's friend's mom- she is the one who has the beach house that we stayed at for our anniversary this year, and I made a Thank You card to send her. She liked it so much that a few weeks later, she put in a huge order for some cards from my shop! We are going to be staying at the house again for a week for our summer vacation next month, so as a thank you, I made a set of notecards for her in different washi paper patterns. Here are those:
For a couple of these, I used paper that I bought from an Etsy seller that I found who brought a bunch of washi papers back from Japan. She makes lovely boxes and other things that she covers with the paper, and sold some of the scraps as supplies. I bought two batches from her awhile back, and had hoped to go back for more, but recently I checked her shop and it was almost all gone! :( Well, hopefully she will restock!
Not much else on the agenda for the time being. We're getting ready for vacation, and after that it will be time to get the kids ready to go back to school. How time flies! I have been mulling over the idea of making more occasion-specific cards for my shop...the blank cards don't seem to sell that well from what I've heard from other sellers. So maybe I will try adding specific sentiments to some and see how that goes.
Monday, June 25, 2012
Custom Personalized Bookmark
Hey, I just realized that I passed my 100th post milestone a couple of posts ago! Shows how much I've been paying attention,eh? Well, happy 100th post to me anyway!
I got a custom personalized bookmark and gift envelope order late last week, and what really made me happy is that it was a customer for whom I had done a similar project a couple of months ago. I send coupons for a future purchase with every order I send out, and in almost 2 years of sending them, this was the first one that was actually redeemed! I am always glad to get repeat customers, because that tells me that they truly like my work. This order was for a bookmark with blue and yellow flowers, and she left the design up to me. My favorite kind of project! Here is the bookmark:
I again went for the collage-style on this one, as it has really grown on me, and it really makes each bookmark unique.
For the gift envelope, I have to admit I was a little stumped at first. I had a pretty pale yellow and white floral patterned paper that I loved- I have used it on several projects, including these cards. Alas, I only had the one sheet of it, and my supply is now nearly gone. I had enough to use on the reverse of the bookmark, but not enough for the gift envelope. I planned to do the envelope itself in blue, but needed something yellow to embellish it. I also wanted it to coordinate with the bookmark. I brainstormed and considered a few different ideas: embossing plain yellow paper, finding a stamp and creating my own patterned paper, buy a border punch that could punch out a floral cutout strip, or find some other yellow patterned paper to use. My preference was to find a paper that could be used on both the reverse side of the bookmark and the envelope. Unfortunately, there don't seem to be very many patterned papers out there in pale yellow shades! Michaels had literally nothing- I even checked all of the expensive pads of designer papers. I did find a border punch that would work if I went that route- however, it was $28- ouch! Craft Warehouse was also a disappointment. Finally, I found a paper at JoAnn's in a lovely yellow and blue daisy pattern, and it was only 59 cents, so it was a no-brainer- that's what I went with!
Here's the bookmark reverse side:
and here is the gift envelope:
And, everything all together:
Now that I've done a couple of these personalized collage-style bookmarks, I have decided to add that option to my shop. I didn't want to replace the old three-flower style, in case someone prefers it, so I added a new listing for this style. Since I do use about twice the amount of flowers, I did up the price, but it's only $1 more.
I worked on a couple of other cards this weekend, but haven't had time to take pics yet. It's been awhile since I added anything new to my shop, so I'm working on making some new items to stock the shop with. Check back soon for those new designs!
I got a custom personalized bookmark and gift envelope order late last week, and what really made me happy is that it was a customer for whom I had done a similar project a couple of months ago. I send coupons for a future purchase with every order I send out, and in almost 2 years of sending them, this was the first one that was actually redeemed! I am always glad to get repeat customers, because that tells me that they truly like my work. This order was for a bookmark with blue and yellow flowers, and she left the design up to me. My favorite kind of project! Here is the bookmark:
I again went for the collage-style on this one, as it has really grown on me, and it really makes each bookmark unique.
For the gift envelope, I have to admit I was a little stumped at first. I had a pretty pale yellow and white floral patterned paper that I loved- I have used it on several projects, including these cards. Alas, I only had the one sheet of it, and my supply is now nearly gone. I had enough to use on the reverse of the bookmark, but not enough for the gift envelope. I planned to do the envelope itself in blue, but needed something yellow to embellish it. I also wanted it to coordinate with the bookmark. I brainstormed and considered a few different ideas: embossing plain yellow paper, finding a stamp and creating my own patterned paper, buy a border punch that could punch out a floral cutout strip, or find some other yellow patterned paper to use. My preference was to find a paper that could be used on both the reverse side of the bookmark and the envelope. Unfortunately, there don't seem to be very many patterned papers out there in pale yellow shades! Michaels had literally nothing- I even checked all of the expensive pads of designer papers. I did find a border punch that would work if I went that route- however, it was $28- ouch! Craft Warehouse was also a disappointment. Finally, I found a paper at JoAnn's in a lovely yellow and blue daisy pattern, and it was only 59 cents, so it was a no-brainer- that's what I went with!
Here's the bookmark reverse side:
and here is the gift envelope:
And, everything all together:
Now that I've done a couple of these personalized collage-style bookmarks, I have decided to add that option to my shop. I didn't want to replace the old three-flower style, in case someone prefers it, so I added a new listing for this style. Since I do use about twice the amount of flowers, I did up the price, but it's only $1 more.
I worked on a couple of other cards this weekend, but haven't had time to take pics yet. It's been awhile since I added anything new to my shop, so I'm working on making some new items to stock the shop with. Check back soon for those new designs!
Friday, June 22, 2012
Another Sympathy Card
Hello- it's still rather busy these days, so I have not done much in the way of crafting. I am currently working on a custom bookmark and gift envelope though, so will post pics of that soon. I also just made another sympathy card. This one is for the family of my hubby's best friend, whose brother passed away recently in a tragic accident. The service is tomorrow, so I wanted to send a card with him.
I actually came quite close to making the same card as the previous sympathy card I did for my coworker. But I looked through my paper stash and found this one, and decided to use it instead. The card base is black, and the next layer is a caramel-colored paper that I embossed with a viney floral embossing folder. The sentiment was printed out on the computer, and the inside says "Our thoughts are with your at your time of loss".
I do hope they like it. Incidentally, my hubby's friend's mother, for whom this card is intended, placed a rather large order for several cards from my Etsy shop recently, so I do hope that she likes this one. I feel terrible for their family for the loss they have suffered. No one should ever have to lose a child.
Next time I'll post pics of the custom project I'm working on. I am happy to be doing this one- it's for a repeat customer, who ordered a personalized bookmark and gift envelope from me in April, and for this one she used the coupon I sent with her order. Two years of sending coupons, and this is the first one that was actually used- woohoo!
I actually came quite close to making the same card as the previous sympathy card I did for my coworker. But I looked through my paper stash and found this one, and decided to use it instead. The card base is black, and the next layer is a caramel-colored paper that I embossed with a viney floral embossing folder. The sentiment was printed out on the computer, and the inside says "Our thoughts are with your at your time of loss".
I do hope they like it. Incidentally, my hubby's friend's mother, for whom this card is intended, placed a rather large order for several cards from my Etsy shop recently, so I do hope that she likes this one. I feel terrible for their family for the loss they have suffered. No one should ever have to lose a child.
Next time I'll post pics of the custom project I'm working on. I am happy to be doing this one- it's for a repeat customer, who ordered a personalized bookmark and gift envelope from me in April, and for this one she used the coupon I sent with her order. Two years of sending coupons, and this is the first one that was actually used- woohoo!
Monday, June 11, 2012
A Few New Cards
Just a quick post today, to share pictures of the cards I made over the weekend. The first one is for a coworker who lost her husband to cancer. The agency I work for is getting a nice plant for her, and I volunteered to make a card. This is what I did:
The plant we are giving her is a hydrangea, which I love, and I had wanted to try to coordinate the card colors to the flowers. However, I couldn't find a paper I liked in the right color. This one is nice though- it's a very subtle floral in pretty sky blue shades, with just a hint of gree in in the leaves.
Next is my dad's Father's Day card:
I used the striped paper as the jumping-off point for this one. I like the combination of blues, browns, and green in the paper, although in the piece I used, there is only one green stripe...and it ended up being covered by the sentiment. I liked this paper for my dad because his favorite color is blue.
Lastly, I managed to make a couple of new washi paper cards:
I mentioned awhile back that I had found a seller on Etsy, susiestablefare, that sells washi paper, in addition to some of her own creations with it. These two papers were from the bundles I purchased from her a couple of months ago, and I really like the vibrant colors! They are both kind of patriotic too, with the red and blue in them.
That's all for now- not sure what to work on next, but I do need to work on stock for my shop, so check back soon!
The plant we are giving her is a hydrangea, which I love, and I had wanted to try to coordinate the card colors to the flowers. However, I couldn't find a paper I liked in the right color. This one is nice though- it's a very subtle floral in pretty sky blue shades, with just a hint of gree in in the leaves.
Next is my dad's Father's Day card:
I used the striped paper as the jumping-off point for this one. I like the combination of blues, browns, and green in the paper, although in the piece I used, there is only one green stripe...and it ended up being covered by the sentiment. I liked this paper for my dad because his favorite color is blue.
Lastly, I managed to make a couple of new washi paper cards:
I mentioned awhile back that I had found a seller on Etsy, susiestablefare, that sells washi paper, in addition to some of her own creations with it. These two papers were from the bundles I purchased from her a couple of months ago, and I really like the vibrant colors! They are both kind of patriotic too, with the red and blue in them.
That's all for now- not sure what to work on next, but I do need to work on stock for my shop, so check back soon!
Saturday, June 9, 2012
And..Another Graduation Exploding Box!
June is a VERY busy month here- last month of school and all, and I can barely keep up! Therefore, I have not been doing much crafting lately. It is all I can do to get a full night's sleep these days!
I did recently get a call from a very nice lady named Mary Beth. She is a neighbor of Janet, the very nice lady who ordered a graduation exploding box at the Salem Etsy Team Spring Sale last month. She evidently saw the box card I made for Janet, and contacted me about making one for her niece, who is graduating from high school this month. I was happy to have another exploding box project to work on!
The recipient of this box card is a swimmer, so I had the task of finding a way to symbolize that in the box card. I found several swimmer symbols, but settled on one that seemed to coordinate best with the colors and design of the box.
I paired the swimmer symbol with the school seal, and I think it works well.
I used the school logo, as well as the seal, incorporated with other graduation imagery to make this exploding box card. It is a great example of an exploding box card, with a variety of colors and images. I love how it turned out, and I hope that Mary Beth does too (as well as her niece!)
Since I have not had any time to craft lately, I am trying to catch up this weekend, and I really have a full plate. I have a sympathy card to make for a coworker, as well as a Father's Day card for my dad, and that's the minimum....if I have time, I have several graduates for whom I'd like to make a card, not to mention my son's birthday at the end of the month. Can't believe he will be 16!!! In addition to all of that, I know I need to make some additional stock for my Etsy shop. One thing at a time- I can only do what I can do! Hopefully next time I will have some cards to share.
Sunday, May 13, 2012
Graduation Exploding Box
Last week at the Salem Etsy Team Spring Sale, I met a very nice lady who requested a custom graduation exploding box card. I had one that I had previously made there as a sample, and she loved it so much she wanted one for a family member who is graduating from a local university in June. I was happy for the challenge! I made my sample box in the colors of my son's high school, complete with the high school logo, and my customer really liked that, and asked that I do the same using the university's colors and logo.
Now, I've posted exploding box cards here before, but this one is different. This one is not a standard box, but an octagonal one! Part of this idea actually came from my BFF Kendra awhile back, when I was in the planning stages for the craft show last weekend. She said I ought to have an exploding box there for people to see, and suggested one in a graduation theme. I took that idea and played with it, and came up with a design for a box that looks like a graduation cap- cute, huh? I found a tutorial for the octagonal exploding box on a blog here, although after doing the first one, I figured out a slightly different way of making the layers. Check back here for a tutorial on that in the future! I really like the results of this- I hope my customer does too!
As you can see, this is a far more complicated box than the standard four-sided box! It is a lot of measuring and cutting for the three layers, and embellishing 24 panels plus the bottom is very labor-intensive. However, it's worth it- what a dramatic presentation!! I am so happy with how this turned out, and I hope my customer is happy with it! The panels on the outer two layers are embellished with some graduation paper that has sayings on it like "Congratulations" and "Celebrate". The center layer, has the university logo and "Class of 2012", which I printed out on the computer. I made the tassle out of embroidery floss,and attached a little tag with a ribbon, so that she can write a message to the box card recipient. The tassle attaches to the box lid with a brad that I found at Michaels- it was just perfect for this!
In other news, I hit a big milestone in my Etsy shop today- I made it over 100 sales! My hubby's best friend's mom placed a big order for 8 cards from my shop today- what a sweetheart! Thanks Sharon! You might remember this thank you card from a few weeks ago- this was the card that I made to send to Sharon and her husband for letting us use their beautiful beach house to celebrate our anniversary. I guess she loved the card so much she wanted to buy some of her own! Anyway, I was only 3 items shy of 100, so Sharon's order put me over the top and then some!
Well, I guess I will start working on some stuff for Father's Day next, since it's just a month away. If I had more time, I'd prepare months in advance for each holiday or occasion, but as busy as life is these days, that won't happen for awhile. Maybe when I retire!
Now, I've posted exploding box cards here before, but this one is different. This one is not a standard box, but an octagonal one! Part of this idea actually came from my BFF Kendra awhile back, when I was in the planning stages for the craft show last weekend. She said I ought to have an exploding box there for people to see, and suggested one in a graduation theme. I took that idea and played with it, and came up with a design for a box that looks like a graduation cap- cute, huh? I found a tutorial for the octagonal exploding box on a blog here, although after doing the first one, I figured out a slightly different way of making the layers. Check back here for a tutorial on that in the future! I really like the results of this- I hope my customer does too!
As you can see, this is a far more complicated box than the standard four-sided box! It is a lot of measuring and cutting for the three layers, and embellishing 24 panels plus the bottom is very labor-intensive. However, it's worth it- what a dramatic presentation!! I am so happy with how this turned out, and I hope my customer is happy with it! The panels on the outer two layers are embellished with some graduation paper that has sayings on it like "Congratulations" and "Celebrate". The center layer, has the university logo and "Class of 2012", which I printed out on the computer. I made the tassle out of embroidery floss,and attached a little tag with a ribbon, so that she can write a message to the box card recipient. The tassle attaches to the box lid with a brad that I found at Michaels- it was just perfect for this!
In other news, I hit a big milestone in my Etsy shop today- I made it over 100 sales! My hubby's best friend's mom placed a big order for 8 cards from my shop today- what a sweetheart! Thanks Sharon! You might remember this thank you card from a few weeks ago- this was the card that I made to send to Sharon and her husband for letting us use their beautiful beach house to celebrate our anniversary. I guess she loved the card so much she wanted to buy some of her own! Anyway, I was only 3 items shy of 100, so Sharon's order put me over the top and then some!
Well, I guess I will start working on some stuff for Father's Day next, since it's just a month away. If I had more time, I'd prepare months in advance for each holiday or occasion, but as busy as life is these days, that won't happen for awhile. Maybe when I retire!
Sunday, May 6, 2012
After the Craft Show
Hello- I have been so busy the past couple of weeks getting ready for the Salem Etsy Team Spring Sale that I have not had time to post! The sale was yesterday, and I had a blast! It was so great meeting customers and other Salem Etsy Team members- I can't think of a better way to spend a spring Saturday! I was in a crafting frenzy in the week or two before the sale, and hauled everything I had in my inventory to the sale. Now that it's over, I have a lot of new stuff that I will be listing in my shop in the next few days, and I thought I would give you all a preview!
More to come soon, as soon as I have time to take photos of all the new stuff! There are a few things I am really excited about. One is that I found a really great supplier of Japanese washi paper on Etsy, susiestablefare . Last week, ordered some paper from her, and it arrived just two days later! Of course it helps that she is only about 40 miles away from me, but I love to find sellers who are so diligent about shipping out promptly! I will definitely be ordering from her again! She does some beautiful work with boxes that she covers with washi paper, so check out her shop if you are into that sort of thing!
I came out of the craft show yesterday with a custom order for a graduation exploding box, and I am very excited about that also. I did one for the show to have as an example, and while it was complicated and challenging to put together, I think the next time around will not be as tough. This box is different than the others I have done- it's an octagon! That means a LOT more cutting, and by that I mean manual cutting with scissors, not a paper trimmer. The result is really stunning though! I don't have a picture of the full box yet, but here is a pic from yesterday's show, and the box is on the table in front of me. It's the one that looks like a graduation cap:
The one I will be doing for a custom order is for an upcoming graduate of Western Oregon University (WOU), so I will be doing the box in WOU colors. It should be fun, and I will post pictures when I have it all done!
More to come soon, as soon as I have time to take photos of all the new stuff! There are a few things I am really excited about. One is that I found a really great supplier of Japanese washi paper on Etsy, susiestablefare . Last week, ordered some paper from her, and it arrived just two days later! Of course it helps that she is only about 40 miles away from me, but I love to find sellers who are so diligent about shipping out promptly! I will definitely be ordering from her again! She does some beautiful work with boxes that she covers with washi paper, so check out her shop if you are into that sort of thing!
I came out of the craft show yesterday with a custom order for a graduation exploding box, and I am very excited about that also. I did one for the show to have as an example, and while it was complicated and challenging to put together, I think the next time around will not be as tough. This box is different than the others I have done- it's an octagon! That means a LOT more cutting, and by that I mean manual cutting with scissors, not a paper trimmer. The result is really stunning though! I don't have a picture of the full box yet, but here is a pic from yesterday's show, and the box is on the table in front of me. It's the one that looks like a graduation cap:
The one I will be doing for a custom order is for an upcoming graduate of Western Oregon University (WOU), so I will be doing the box in WOU colors. It should be fun, and I will post pictures when I have it all done!
Thursday, April 26, 2012
Spring Sale Sneak Peek!
And here's a little something extra that I plan to offer with the cards at the Salem Etsy Team Spring Sale:
Subscribe to:
Posts (Atom)